The Terminator is a low cost and easy to use robotic kit, it includes:
- Terminator chassis
- Dual channel motor controller
- Arduino Duemilanove
- USB cable
- AA x 4 battery case
- some wires for connections
No soldering is required!!
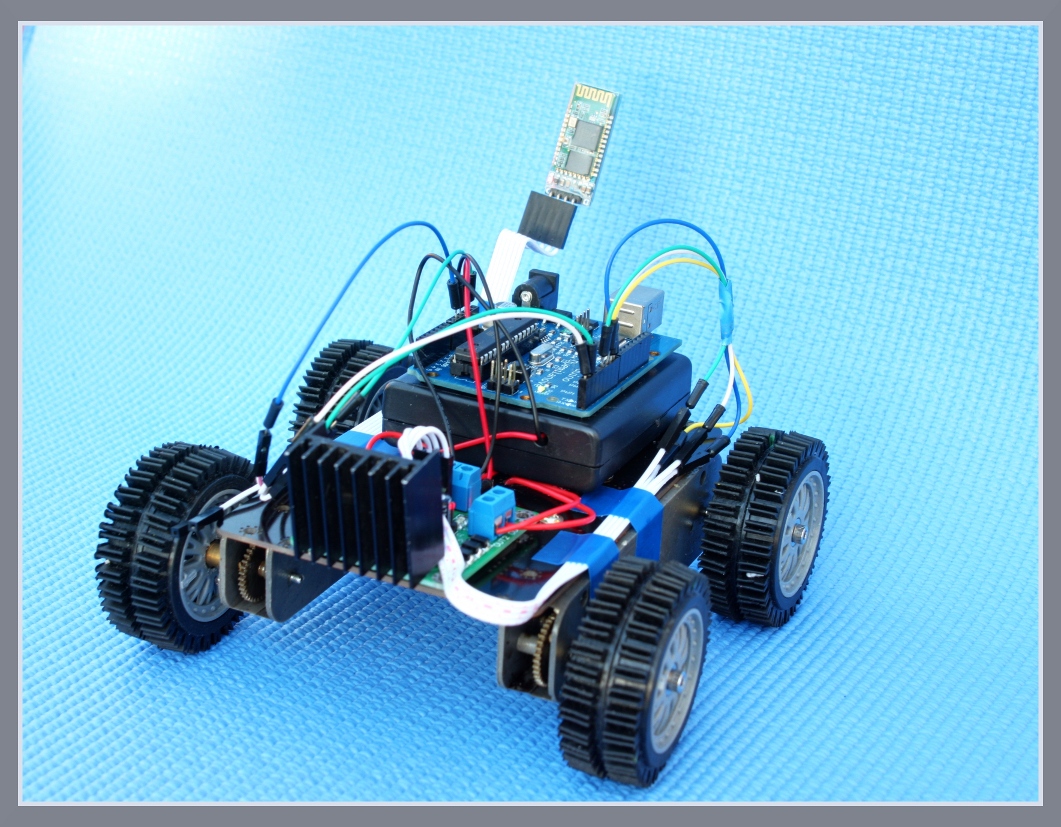
The Terminator shown in the photos here uses the Arduino Demilanove ( Can be replaced with Uno with no change in functionality or code )
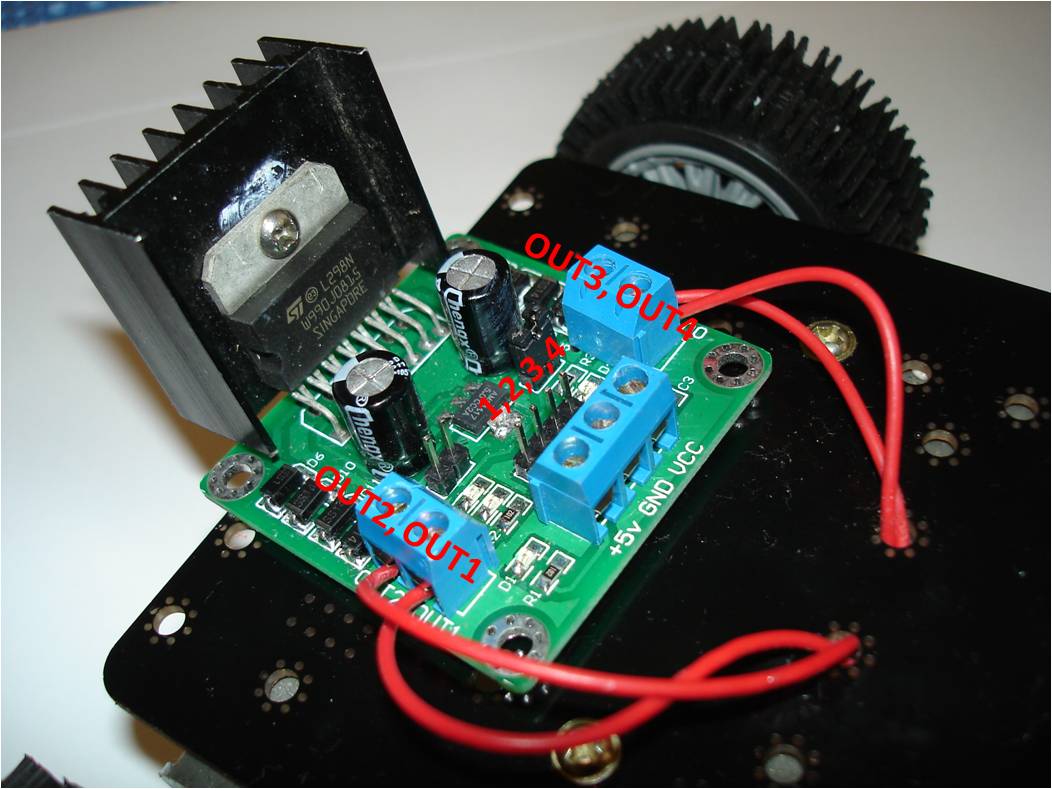
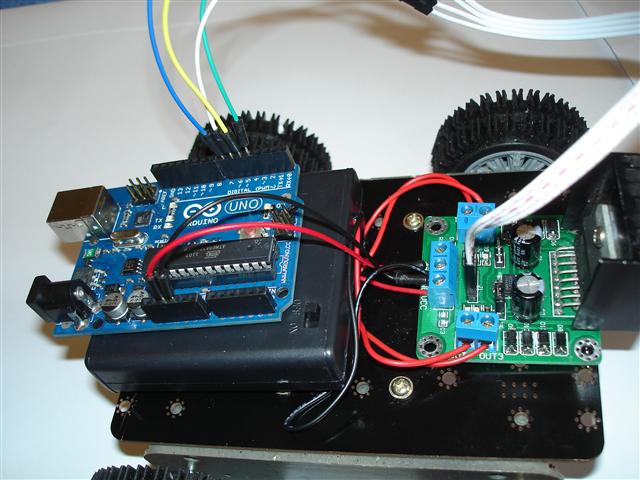
The pin out of the motor controller is depicted in the photo below
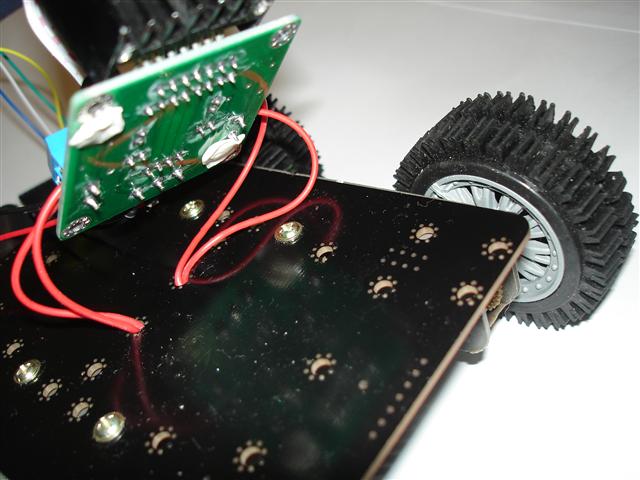
Blu-tack is used to fix the electronics on the chassis.
Ok, now it's time to wire the electronics up..First of all, connect the battery case to the Acc (red) and GND (black) of the controller. Then, use the provided wires, connect the controller to the Arduino according to the table below
| Motor controller | Arduino |
|---|---|
| 5 V | 5 V |
| GND | GND |
| 1 | Pin 5 |
| 2 | Pin 6 |
| 3 | Pin 9 |
| 4 | Pin 10 |
Note: the reason why the Arduino pin 5,6,9,10 are chosen is because they all support PWM, which is needed for motor speed control using analogWrite() in the code.
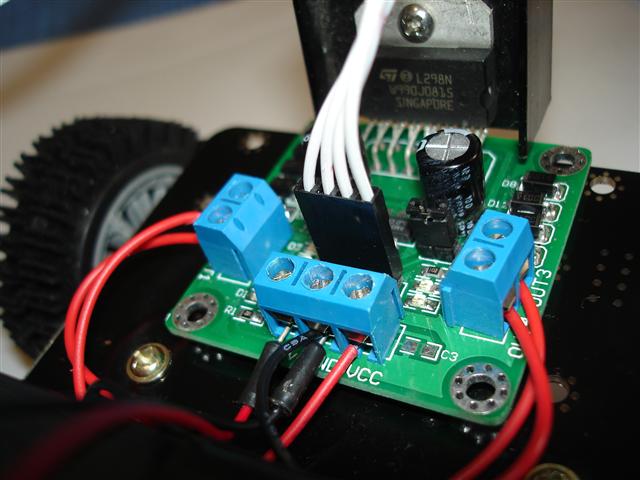
Note that the GND of the controller needs to be shared with the Arduino and the battery case. Photo below shows the controller signals and power pins being connected to the Arduino.
For testing, no battery is needed, or the battery case can be left at the OFF position. Plug the Arduino to the PC via a USB cable, and down load this example code to the Arduino. Switch on the serial monitor, and send the key 'e', and press enter, the Terminator should be turning..Play with the code and change anything you want. It is much easier to control the Terminator using the puTTY serial com interface instead of the Arduino Serial monitor, because in puTTY you don't need to press the enter key every time you send a command.
How to make the Terminator go wireless ?
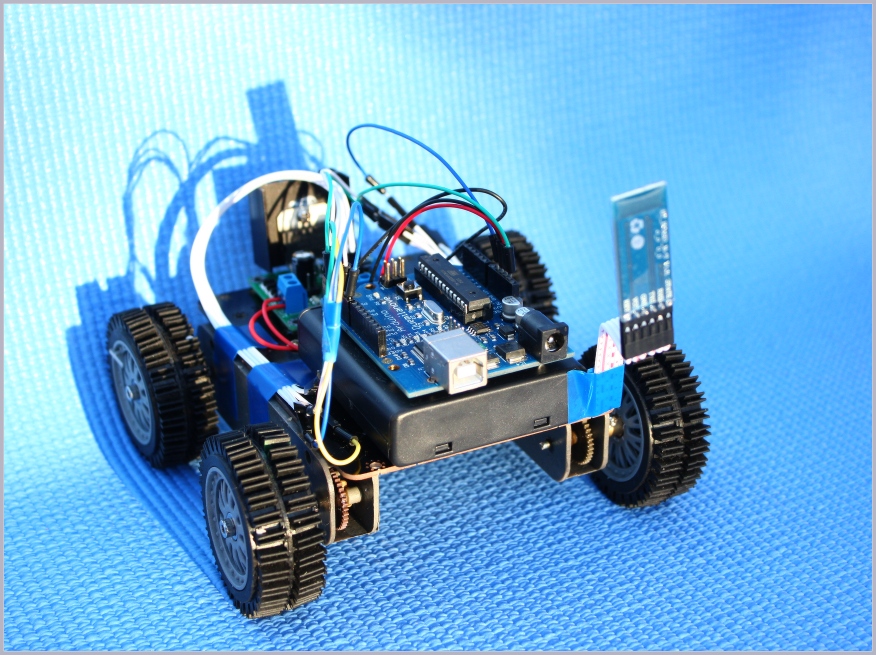
To make the Terminator go wireless, all you need is a Bluetooth module,
No modification is needed for the Arduino code. Since the Arduino only receives and sends data through its serial port, it doesn't even know and doesn't care whether the serial port is a Bluetooth or a cable connecting directly to the computer. Photo above shows a wireless Terminator. The LED on the Bluetooth stays on indicting the wireless connection has been established.
The Terminator is ready for action!! There is a detailed tutorial on how to connect the Bluetooth module to the Arduino, See that for more details to interface the Bluetooth Module.