Things that comes as part of kit:
- Esp8266 module
- Arduino
- DHT22 temp/humid senor
- BMP180
- FTDI Board
- Connecting Cables
- Breadboard
- External Power Supply
- Breadboard USB Power Supply
- Complete code for the kit
Parts you will need in addition:
- 9 or 12V power supply to power the breadboard power supply
Wiring:

Figure 1
Breadboard powersupply:
The breadboard powersupply supplies 2 voltages to the breadboard. The jumpers on the powersupply will decide
whether it provides 3.3V or 5V. For this kit, the top rail should be set to 3.3V (see fig1) and bottom to 5V.
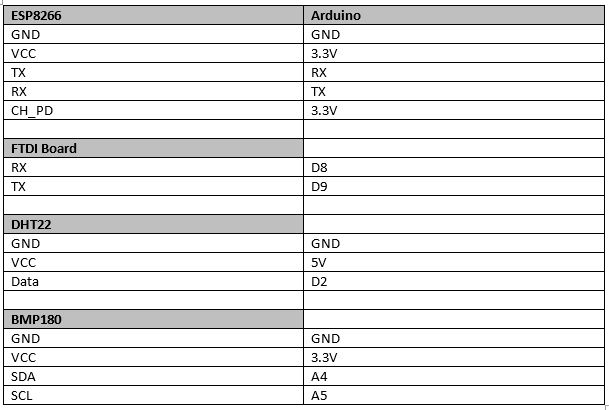
Pin Connection Reference
Code: esp8266_wifi_weathst_kit.ino
For this code to run you will require the libraries below
- Link to download:
Instruction:
- Download all the library from the links that is provided and extract them to the library folder in your computer Arduino folder. The default is <Path to Arduino IDE>/libraries.
- Download the main script code for the project from the link provided above. Extract this in your computer at your preferred location.
- Connect the components as show in the wiring in figure 1. Note that ESP8266 & BMP180 needs to be connect in 3.3v rail.
- Open the main script that you have download previously on the Arduino IDE. Make sure you have select the right Arduino board and correct COM port.
- Change the SSID and PASSWORD in the code to match your Wi-Fi authentication.
- Change the Data Log Customer Key in the code which is provided to you with the Kit. Using wrong Data Log Customer Key will not log the data to the server.
- Change the last delay in Loop() to suit the interval period that you would like data to load on the server. With default it will load every 5 mins.
- Load the code to Arduino.
- The code will start up loading temp and humid to the webserver every 5 mins.
- Connect to the FTDI Board to read the debug info on serial. Note FTDI board will work on different COM. Make sure you change the COM on Serial to match it.
Viewing & Downloading the logged data
To Download CSV format file copy the link below, replacing the [your key] with the your Key.
http://hobbyist.co.nz/sites/default/files/datalog/data/[your key].csv
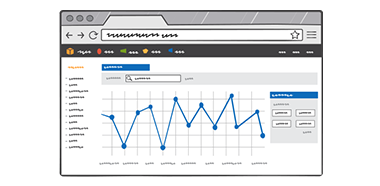
To view live Graphs of the latest data:
http://hobbyist.co.nz/sites/default/files/datalog/graph/graph.html
How to plot your own graphs using the data:
Once you have the csv file its very easy to plot the graphs using Plotly,
Follow the instructions here http://help.plot.ly/add-data-to-the-plotly-grid/
and get some fancy graphs from your data: