Modules

Image: 

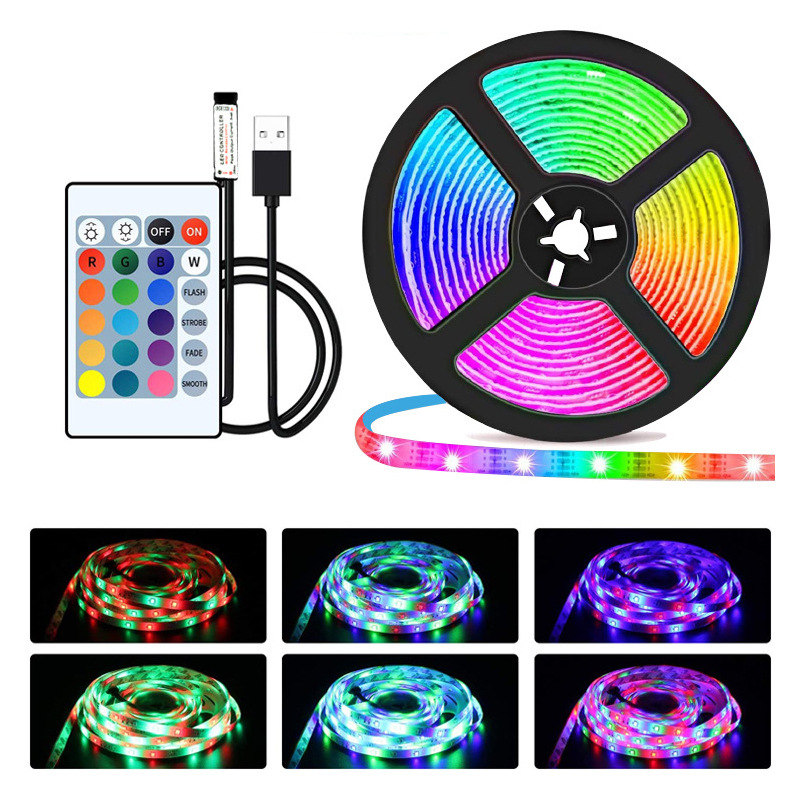
RGB LED light with remote

Description: 

Overview

Do you want to add a bit of flair to your interior decor without burning a hole in your pocket? Are you looking to make your parties more fun? Do you want to make your TV experience more immersive? If your answer to any of these questions is yes, then we have the right product for you. Meet our newest launch: an RGB light strip with Bluetooth remote.

This colourful LED strip can be used in a variety of environments in numerous ways. It is flexible and can be bent and shaped to meet your requirements. You can stick it under cabinets, behind TVs and monitors, along the stretch of your home bar, under your beds, on your walls, etc. for a dazzling array of light effects and colours ranging from subdued to disco. Installing it along the backside edges of your TV or a monitor, for example, creates an immersive viewing and gaming experience.

No matter where you place these RGB lights, controlling them is incredibly easy with the included remote. Since the remote uses Bluetooth to send commands, even the lights that are installed in the difficult-to-reach corners of your house can be controlled easily and reliably from a distance. The slick remote includes dedicated buttons for on/off functions, brightness controls, RGBW colours, and light effects such as Flash, Strobe, Fade, and Smooth.

The LEDs are powered via a USB cable, allowing for an easy and inexpensive installation without requiring drilling or the services of an electrician. Even better, it can be removed and installed elsewhere with nothing more than an adhesive tape. It doesn’t require any hubs or apps for setting up or controlling the lights. Best of all, this RGB light strip doesn’t consume a lot of power, which is great both for the environment and your energy bills. Yet, these tiny lights, like all other LEDs, pack a punch when it comes to brightness.

All these advantages and flexibility make this RGB light strip a perfect choice to light up a variety of objects and occasions. So, what are you still waiting for? Order this RGB light strip from our online store right now!
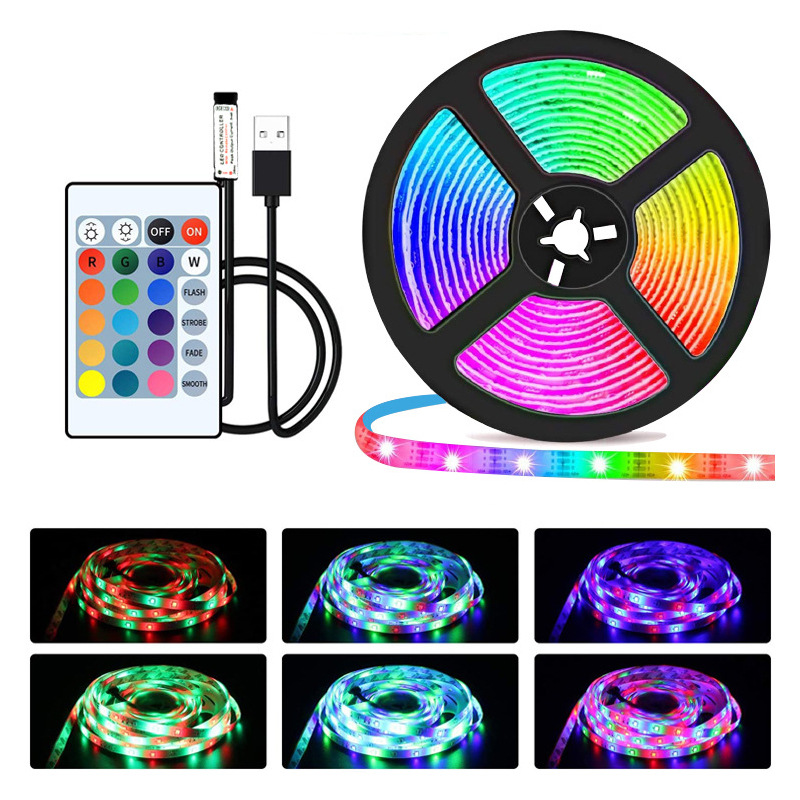
Reasons to buy this RGB light strip

  • Easy to install, transfer, or remove
  • Energy-efficient LEDs
  • A dazzling array of colours and effects
  • Inexpensive and long-lasting
  • Plug-and-play operation
  • Bluetooth remote control
  • Unobtrusive looks when not in use
  • Gentle on the eyes

Technical Specifications

  • Colour Support: Yes (RGBW)
  • Form Factor: Strip
  • Dimmable: Yes
  • Length: 
  • Light Type: LED
  • Voltage: 5V
  • Port Type: USB
  • Remote Control: Yes
  • Connection Type: Bluetooth
  • App Support: No

Package Contents

  • LED light strip
  • Bluetooth remote
  • USB cable

Applications

There is no limit to where you can use this RGB light strip in your home. You can install it on, under, and/or behind any solid object, provided you can supply power. With this versatile light strip, your imagination is the only limit.

Some of the most common use cases for these LED light strips include: 

  • Behind monitors and TVs
  • Under-cabinet lighting
  • Cove lighting
  • Lighting under stairs
  • Pathway lighting
  • Mood setting for parties
  • Dazzling festive decorations
  • Strobe effect for disco at home

Frequently asked questions:

What are LED light strips and how are they used?

LED light strips are a form of lighting solution that relies on a series of small light-emitting diodes (LEDs) on a flexible strip for illumination. They are used for both decorative and general lighting in a variety of indoor and outdoor spaces. These strips generally allow users to control the LED colour, intensity, and other light effects through a remote control or an app.

Can these LED light strips be cut into smaller lengths?

Yes, most of these LED strips can be cut into smaller lengths to suit user requirements. There won’t be any damage as long as they are cut at the designated markings on the strip using the recommended tools. Check instructions from the relevant manufacturer before you attempt to cut any light strip.

What is the lifespan of LED strips?

LED light strips are durable, flexible, and will last for many years without any significant deterioration in light uniformity or intensity. Their lifespan is affected by factors such as strip quality, specifications, thermal management, usage patterns, and external factors in the installed environment. The LED lights themselves have a lifespan of up to 50,000 hours. That works out to a lifespan of more that 10 years if it was turned ON for 12 hours every day. Thats a lot.

Do these light strips use a lot of electricity?

No. LED lights are highly energy-efficient and consume up to 90% less electricity than incandescent lighting. So, unless you go overboard with the length and number of strips, these LEDs can actually bring down your electricity bills, while also being a superior mode of lighting.
Catalog: 

Price: $39.99

FTDI usb serial module

Description: 

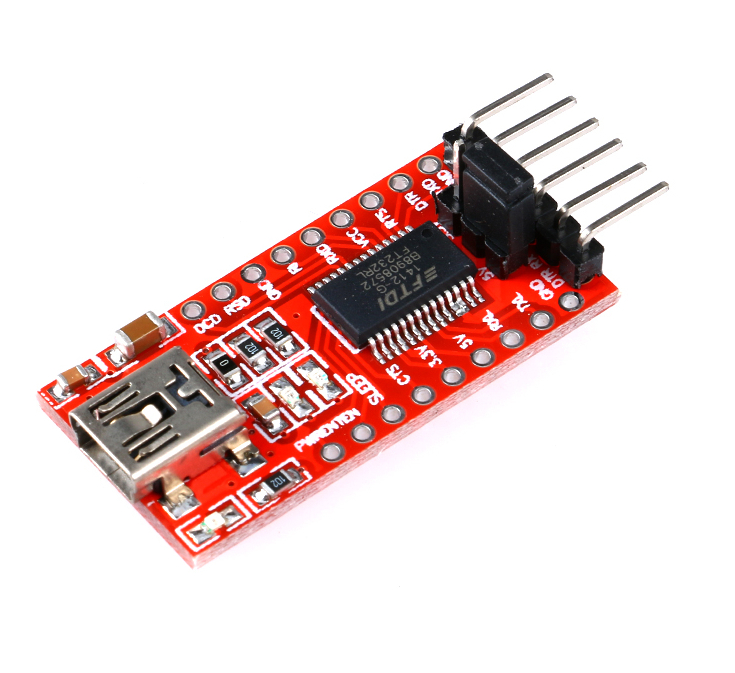
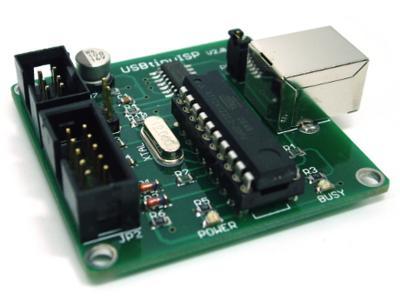
The FT232R is a USB to serial UART interface.  A low-cost way to add USB capability to For arduino or other microcontrollers.

Use this to give your own breadboard For arduino USB capability for bootloading or downloading sketches.  It has an on board LED indicator for RXD/TXD transceiver communication.

Includes over-current protection, using a 500ma self-restoring fuse.This board includes a DTR pin needed to auto-reset For arduino when downloading to your device.

This usb to serial adapter module has a selectable 5V or 3.3V operation mode making it suitable for connecting it to the Raspberry Pi serial port pins ( which operates only on 3.3V ).


Fig: 5V - 3V Selector 


This is the ideal tool to connect to Serial GPS, configuring Openlog modules and flashing/upgrading the bootloader for Arduino.

This is a must-have module in the hobbyist toolkit. At its heart is the FTDI module which is well supported on Windows, Linux and MAC, which gives you a plug and play operations without having to run behind drivers.


Specs:

  • Chip: FT232RL
  • Draw out all signal port of FT232RL chip
  • RXD / TXD transceiver communication indicator
  • USB power supply, can choose 5V or 3.3V, set by jumper
  • With over current protection, using 500mA self-restore fuse
  • Pin definition: DTR, RXD, TX, VCC, CTS, GND
  • Pitch: 2.54mm
  • Size: 36 x 18mm (L x W)
  • Interface: Mini USB

FTDI Driver installation for Windows:

Link

Usb to serial adapter, usb to serial, rs232, usb cable, arduino usb2serial, serial port to usb connector, serial port to usb, adapter rs232 to usb, serial over usb, serial adapter cable,


Catalog: 

Price: $24.99

Touch screen Lcd for Arduino Uno & Mega 2.4 inch

Description: 

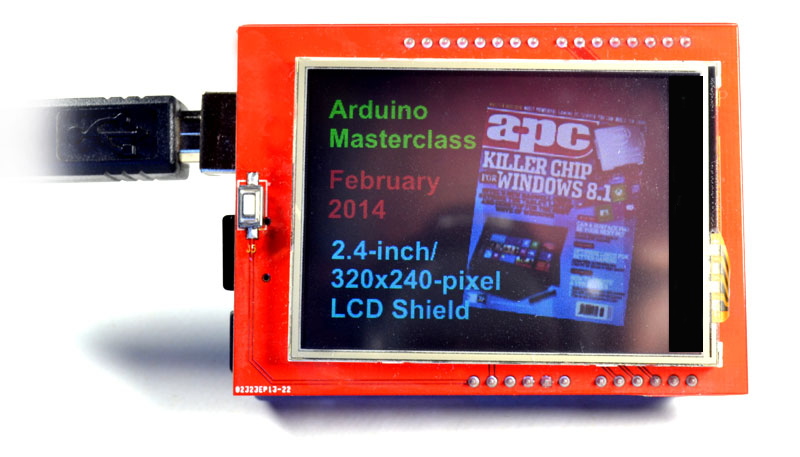
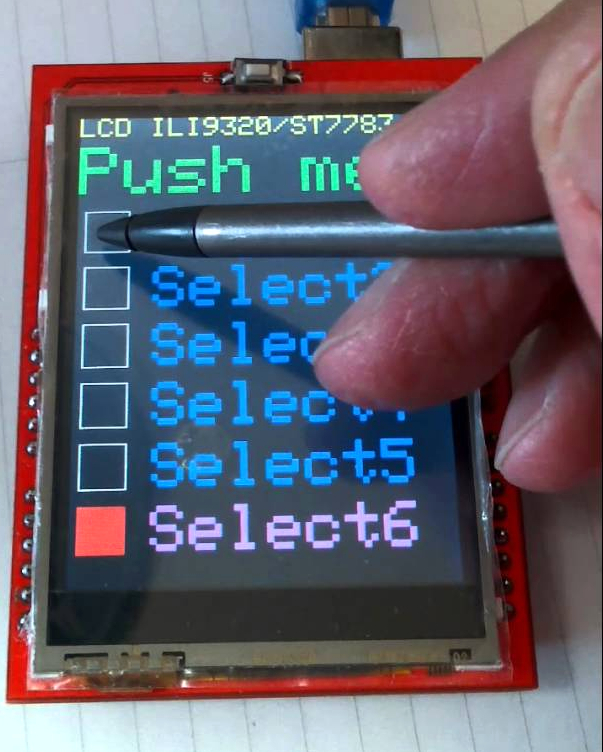
Quite a lot of projects needs a screen to display information, be it temperature/humidity or vehicle speed or an image from the internet. This is a perfect display to fit these projects, it has 65k colors and a resolution of 240 x 320. It even has touch capablity and comes with code examples to make it easy to get started. You can build your touch sensitive interactive project using this display without much effort.


The shield works well with Arduino Mega and Uno, it comes with an SD card slot which can be used to store high resolution images and data. The details on how to access the SD card is given below.


Arduino Pin Connections

Arduino Pin LCD Shield Pin Use
3.3V 3.3V Power
5V 5V Power
GND GND Power
A0 LCD_RD LCD Control
A1 LCD_WR   TOUCH_YP LCD Control / Touch Data
A2 LCD_RS     TOUCH_XM LCD Control / Touch Data
A3 LCD_CS LCD Control
A4 LCD_RST LCD Reset
D2 LCD_D2 LCD Data
D3 LCD_D3 LCD Data
D4 LCD_D4 LCD Data
D5 LCD_D5 LCD Data
D6 LCD_D6 / TOUCH XP LCD Data/ Touch Data
D7 LCD_D7 / TOUCH YM LCD Data / Touch Data
D8 LCD_D0 LCD Data
D9 LCD_D1 LCD Data
D10 SD_CS SD Select
D11 SD_DI SD Data
D12 SD_DO SD Data
D13 SD_SCK SD Clock

Link to library with examples to get the touch screen LCD working:

http://hobbyist.co.nz/sites/default/files/lcdTouch2.4/SPFD5408.zip

Install library in the <Path to Arduino IDE>/libraries folder 

Once installed open the File->Examples->SPFD5408 to view and run the examples


To access the SD card, download the sdfat library from this link

https://github.com/greiman/SdFat


Arduino display, arduino keypad, keypad arduino, 16x2 lcd arduino, arduino 16x2 lcd, i2c display arduino uno lcd, arduino tft lcd screen, arduino touch screen, arduino lcd keypad, arduino keypad shield

Catalog: 

Price: $39.99

Raspberry pi camera

Description: 

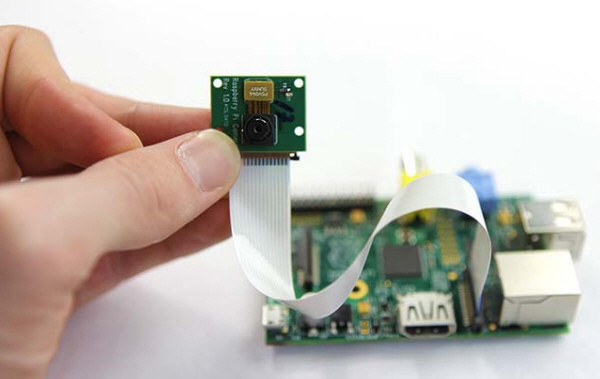
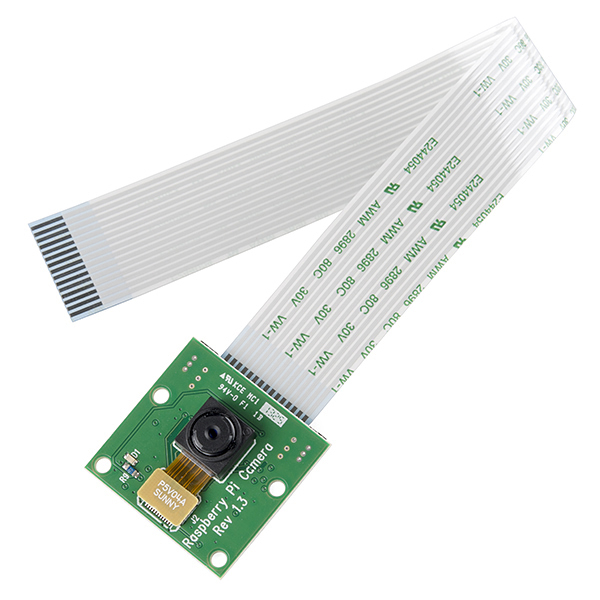
The Camera Module is a custom designed add-on for Raspberry Pi. It attaches to Raspberry Pi by way of one of the two small sockets on the board upper surface. This interface uses the dedicated CSI interface, which was designed especially for interfacing to cameras. The CSI bus is capable of extremely high data rates, and it exclusively carries pixel data.

The board itself is tiny, at around 36mm x 36mm highlight of our module is that the Lens is replaceable compared to official one, making it perfect for mobile or other applications where size and image quality are important. It connects to Raspberry Pi by way of a short ribbon cable. The camera is connected to the BCM2835 processor on the Pi via the CSI bus, a higher bandwidth link which carries pixel data from the camera back to the processor. This bus travels along the ribbon cable that attaches the camera board to the Pi.

The sensor itself has a native resolution of 5 megapixel, and has a fixed focus lens onboard. In terms of still images, the camera is capable of 2592 x 1944 pixel static images, and also supports 1080p30, 720p60 and 640x480p60/90 video.

The camera is supported in the latest version of Raspbian, Raspberry Pi's preferred operating system.

Features:

  • Raspberry Pi HD Camera
  • High-Definition video camera for Raspberry Pi Model A or B.
  • Omnivision 5647 sensor in a fixed-focus module with replaceable Lense
  • Lens holder: M12x0.5 or CS Mount
  • 5MPixel sensor
  • Integral IR filter
  • Still picture resolution: 2592 x 1944
  • Max video resolution: 1080p
  • Max frame rate: 30fps
  • Size: 36 x 36 mm
  • Connection by flat ribbon cable to 15-pin MIPI Camera Serial Interface (CSI) connector S5 on Raspberry Pi computer board
  • The Camera Lens for Raspberry Pi Camera Board is LS-40136

How to use the Raspberry Pi camera software

raspivid is a command line application that allows you to capture video with the camera module, while the applicationraspistill allows you to capture images.

-o or –output specifies the output filename and -t or –timeout specifies the amount of time that the preview will be displayed in milliseconds. Note that this set to 5s by default and that raspistill will capture the final frame of the preview period.

-d or –demo runs the demo mode that will cycle through the various image effects that are available.

Example commands

Capture an image in jpeg format:

#raspistill -o image.jpg

Capture a 5s video in h264 format:

#raspivid -o video.h264

Capture a 10s video:

#raspivid -o video.h264 -t 10000

Capture a 10s video in demo mode:

#raspivid -o video.h264 -t 10000 -d

To see a list of possible options for running raspivid or raspistill, you can run:

#raspivid | less

#raspistill | less

Use the arrow keys to scroll and type q to exit.

Extended documentation is available.

Note that we recommend that you change SSH password if you are using a camera, in order to prevent unwanted access.

How to stream video from the Raspberry Pi camera over a network

To view the feed on Linux

Install the dependencies by running the following in a terminal:

sudo apt-get install mplayer netcat

Find your IP address by running ifconfig. (Your IP address will be listed in the console output and will probably be of the form 192.168.1.XXX).

Run the following command in a terminal to view the feed using MPlayer:

#nc -l -p 5001 | mplayer -fps 31 -cache 1024 -

To view the feed on Windows

Install and run Linux instead.

Find your IP address by running ipconfig. (Your IP address will be listed in the console output and will probably be of the form 192.168.1.XXX).

Download MPlayer & Netcat.( netcat is a tool which allows sending data over the network, its used to send the video from raspberry pi to the computer )

Note that your browser may complain that these files are malicious, as they are unsigned executables.

Press the Windows key and the ‘r’ key simultaneously to bring up the “Run” dialog. Enter cmd.exe into the dialog and press enter/return to open a DOS prompt.

Enter the following command at the prompt to view the feed using MPlayer:

[Path to nc.exe]\nc.exe -L -p 5001 | [Path to mplayer.exe]\mplayer.exe -fps 31 -cache 1024 -

To view the feed on OS X

Download MPlayer.

Alternatively, you can download mplayer using Brew, which we recommend.

Find your IP address by running ifconfig. (Your IP address will be listed in the console output and will probably be of the form 192.168.1.XXX).

Run the following command in Terminal to view the feed using MPlayer:

#nc -l -p 5001 | mplayer -fps 31 -cache 1024 -

To view the feed on a Raspberry Pi:

Find your IP address by running ifconfig. (Your IP address will be listed in the console output and will probably be of the form 192.168.1.XXX).

Run the following commands in a terminal on the receiving Pi:

mkfifo buffer

#nc -p 5001 -l > buffer | /opt/vc/src/hello_pi/hello_video/hello_video.bin buffer

To transmit the feed from the Pi with camera module attached

After setting up the “receiving” machine as per the instructions above, run the following commands in a terminal on the “transmitting” Pi:

#raspivid -t 999999 -o – | nc [insert the IP address of the client] 5001

You can then use the commands listed in the “How to use the Raspberry Pi camera software” section above to change the capture time or to add a video effect.


Catalog: 

Price: $45.99

X-Y Joystick

Description: 

Overview:

The X-Y Joystick for Arduino is a compact dual axis module combining an analogue X, analogue Y and digital press switch control for your Arduino project.  The module provides a gamepad style joystick that interfaces through a 5 pin header, and gives a tactile feedback from the switch when the joystick is pushed down.

Specifications:

Dimensions: 4cm(l) x 2.6cm(w) x 3.2cm(h)

2 Potentiometers (for X and Y axes), 1 switch (vertically operated)

Connection: +5Vcc, Gnd, VRx, VRy, Sw.


Package Contains:

1 X-Y Joystick module.


Applications:


Limited only by your imagination, typical applications could include control of robotics, cameras, CNC type projects, or volume and brightness controls.


FAQ:

Could I use this as part of a security or monitoring system?

Yes; it is ideally suited for such applications, allowing pan and tilt control, and the switch could be used to take a still shot, or to start and stop recording.


How could it be used for CNC, or in the workshop?

By using it as an interface for your project, connected to stepper motors this joystick would allow manual control of machinery.


Can I use it for a robot or turtle type project?

Absolutely; you could almost say that it was designed for just such applications.  The push button switch could be configured in software to toggle, for example, lights or a plotter style pen, or could activate a horn or buzzer.


I've heard that joysticks can be difficult to clean.  Does that apply to this product?

The rubber knob detaches from the board, providing full access to the potentiometers so that a proprietry contact cleaner aerosol has unimpeded access, should you choose to use this in a dusty environment.  In such situations, however, environmental shielding is still recommended.


What about mounting?

The module is pre-drilled at each corner to ensure that it can be robustly mounted however you choose.

Catalog: 

Price: $17.99

Electronic solenoid door lock

Description: 

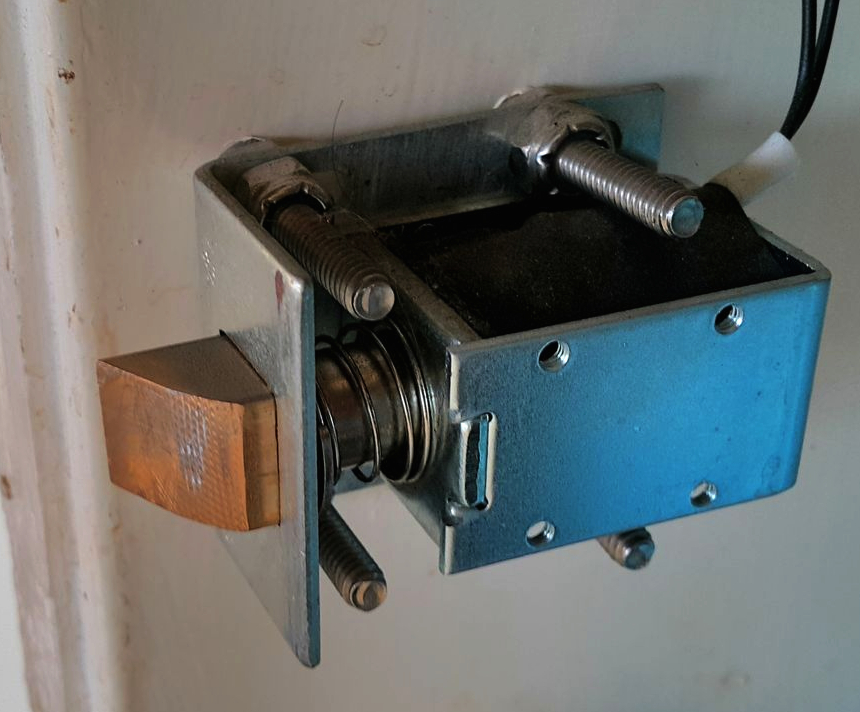
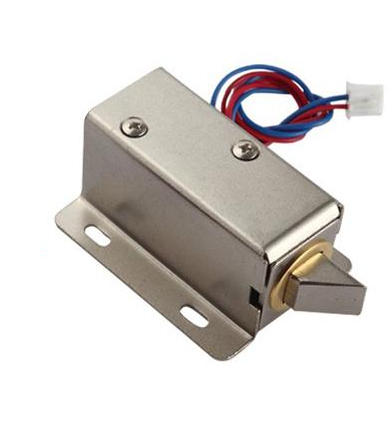
If you have a project to control door or cabinet access with an microcontroller ( or Arduino ), This electronic solenoid lock would do the job for you.


This works on the principle of electromagnetism, wherein a DC current creates a magnetic field which moves the slug. To drive the solenoid you would need a power source which can give 12V @ 500mA. The below circuitry would help you get it going without problems:


Applications:

  • Home Automation
  • Cabinet locking
  • Smart code locking doors
  • Electronic door control for attendance systems
  • Mobile control of door locks


Link to schematic to control the solenoid lock

Technical specs

  • 12VDC (you can use 9-12 DC volts, but lower voltage results in weaker/slower operation)
  • Draws 650mA at 12V, 500 mA at 9V when activated
  • Designed for 1-10 seconds long activation time
  • Max Dimensions: 27mm x 27mm x 17mm
  • Wire length: 222.25mm / 8.75"
  • Weight: 147.71g

Cabinet access control, door access control, arduino door control, lock solenoid, solenoid door lock, sliding door lock, electronic deadbolt, digital lock, gate lock, digital security lock, solenoid locks, door access control systems, single door access control, biometric access control, security access control

Catalog: 

Price: $34.99

esp8266 wifi starter kit

Description: 

Connecting to the internet has not been easier, With the advent of the new IOT ( Internet of things) module ESP8266 its a breeze to connect your microcontroller and

Arduino projects to the internet.

Things you can do with this module:

  • Send you sensor data to server
  • Send an email every time an event occurs, like someone triggering a PIR sensor while you are out on vacation
  • Have an Arduino display what the weather would be like today by getting data from metservices
  • See if your plants need watering by having the Arduino send humidity data through wifi
  • You fill in the rest with your creativity and imagination

ESP8266 specs

Links:

Detailed technical specs and SDK with examples

  • 802.11 b / g / n / d / e / i / k / r support
  • Wi-Fi Direct (P2P) support
  • P2P discovery, P2P group master mode (Group Owner mode), P2P Power Management
  • Infrastructure Network (Infrastructure BSS) station (Station) mode / P2P mode / SoftAP mold
  • hardware acceleratorPre-Certification
    • CCMP (CBC-MAC, counting mode)
    • TKIP (MIC, RC4) o WAPI (SMS4)
    • WEP (RC4)
    • CRC
    • WPA / WPA2 and WPS support
    • Other 802.11i security features:

arduino wifi,wifi network,wi-fi network, esp8266 wifi, esp8266 module,esp8266 wifi module, rs232 to wifi, serial to wifi, wi-fi networking, esp8266 buy, wireless usb, embedded wifi module, module wifi, embedded wlan module, esp8266 serial wifi, usb wireless

What comes as part of the ESP8266 starters kit:


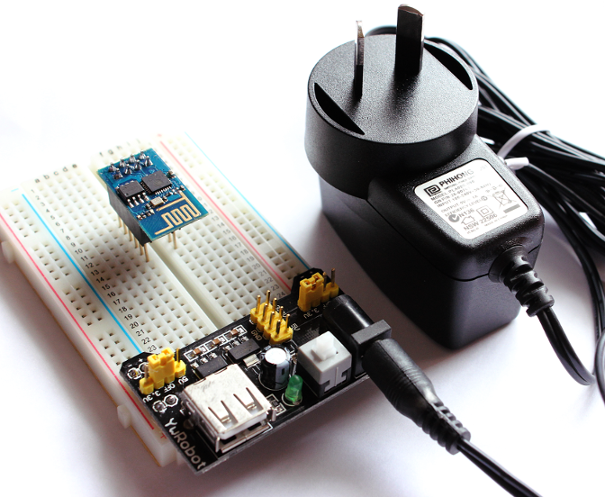
1. Mini Breadboard

2. Breadboard  power supply for providing the 3.3V required by ESP8266

3. ESP8266 module


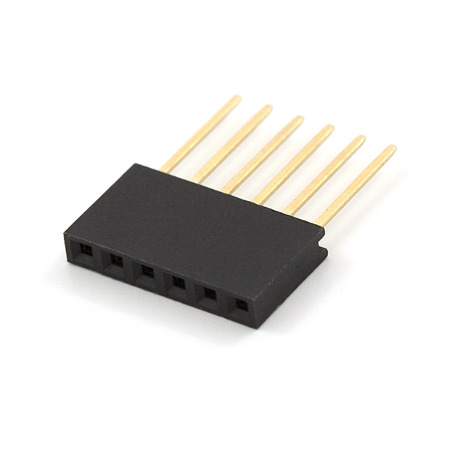
4. ESP8266 headers, without which you cannot mount them on the breadboard

5. 9V Power Adapter for the breadboard power supply

Complete kit:


Instructions to talking with the ESP8266 with FTDI USB serial or via Arduino:

https://maker.pro/education/how-to-connect-a-raspberry-pi-to-a-laptop-display


FAQ

1. Why is the 9v adapter needed? Can't I power with Arduino's 5V?

A. The Esp8266 can draw upwards of 300mAmps, The Arduino power supply would struggle to power the ESP and the Arduino and cause brownout errors. For this reason having a separate power adapter helps.

    Price: $39.99

    Arduino GSM Module SIM900

    Description: 

    aeProduct.getSubject()

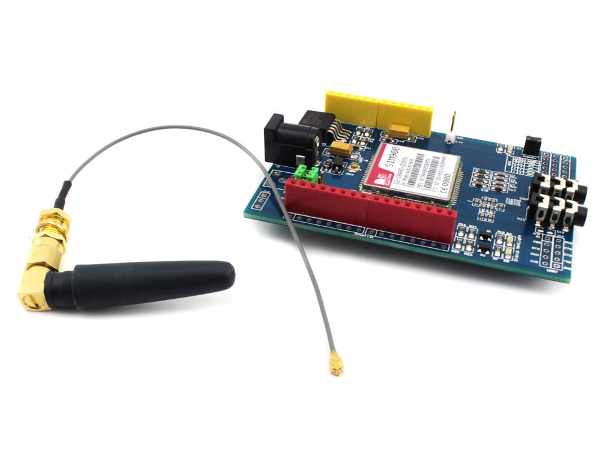
    SIM900 Quad-band GSM GPRS Development Board for Arduino Antenna

    Note:The SIM900 Board Input is 5-26V  2A,We Recommended current is more than 9V 2A. Ensure your SIM card is not locked GPRS Communication baud rate is 19200 BPS 8-N-1

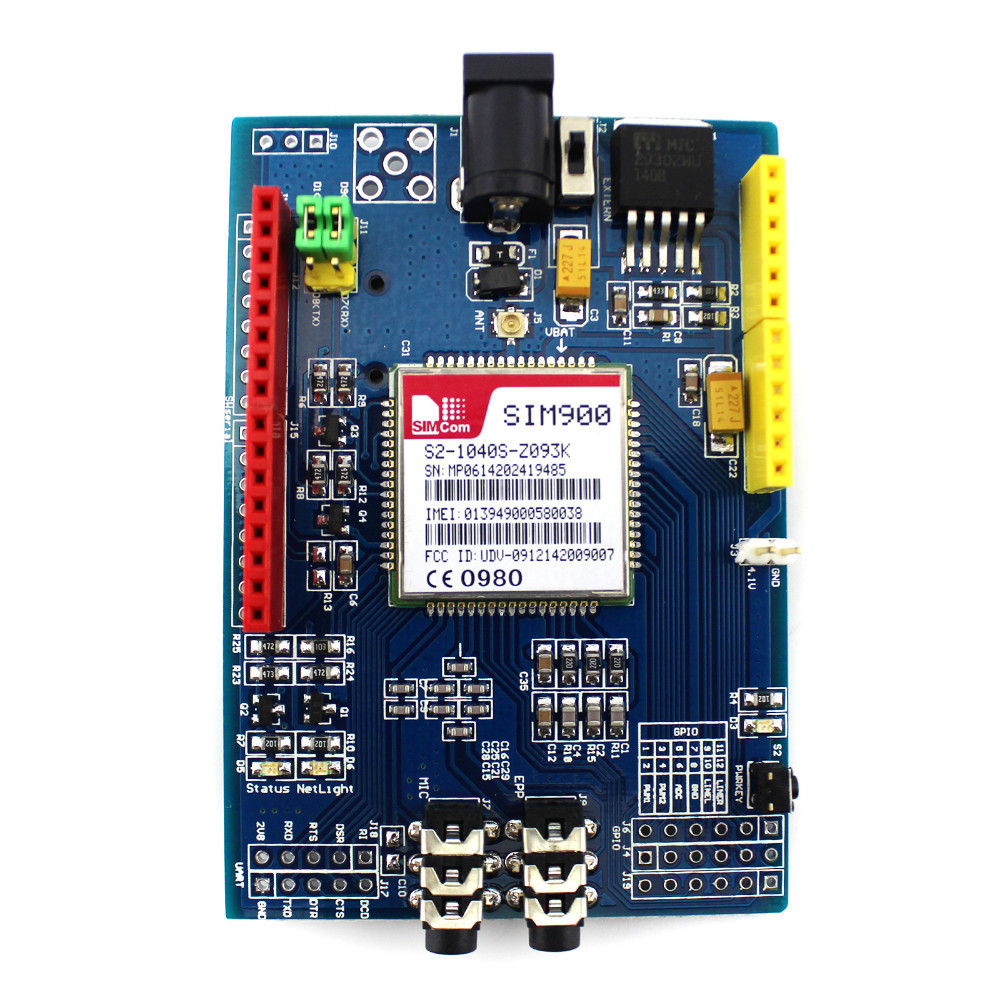
    The GPRS module is based on SIM900 module from SIMCOM and compatible with Arduino and its clones. The GPRS module provides you a way to communicate using the GSM cell phone network. The module allows you to achieve SMS, MMS, GPRS and Audio via UART by sending AT commands (GSM 07.07 ,07.05 and SIMCOM enhanced AT Commands). The module also has the 12 GPIOs, 2 PWMs and an ADC of the SIM900 module(They are all 2V8 logic) present onboard.

    Features

    •  Quad-Band 850 / 900/ 1800 / 1900 MHz - would work on GSM networks in all countries   across the world.
    •  GPRS multi-slot class 10/8
    •  GPRS mobile station class B
    •  Compliant to GSM phase 2/2+
    •  Class 4 (2 W @ 850 / 900 MHz)
    •  Class 1 (1 W @ 1800 / 1900MHz)
    •  Control via AT commands - Standard Commands: GSM 07.07 & 07.05 | Enhanced   Commands: SIMCOM AT Commands.
    •  Short Message Service - so that you can send small amounts of data over the network   (ASCII or raw hexadecimal).
    •  Embedded TCP/UDP stack - allows you to upload data to a web server.
    •  RTC supported.
    •  Selectable serial port.
    •  Speaker and Headphone jacks
    •  Low power consumption - 1.5mA(sleep mode)
    •  Industrial Temperature Range - -40°C to +85 °C

    Specs:


    •  The factory default setting for the GPRS Shield UART is 19200 bps 8-N-1. (Can be changed   using AT commands).
    •  Power select - select the power supply for GPRS shield(external power or 5v of arduino)
    •  Power jack - connected to external 4.8~5VDC power supply
    •  Antenna interface - connected to external antenna
    •  Serial port select - select either software serial port or hareware serial port to be connected    to GPRS Shield
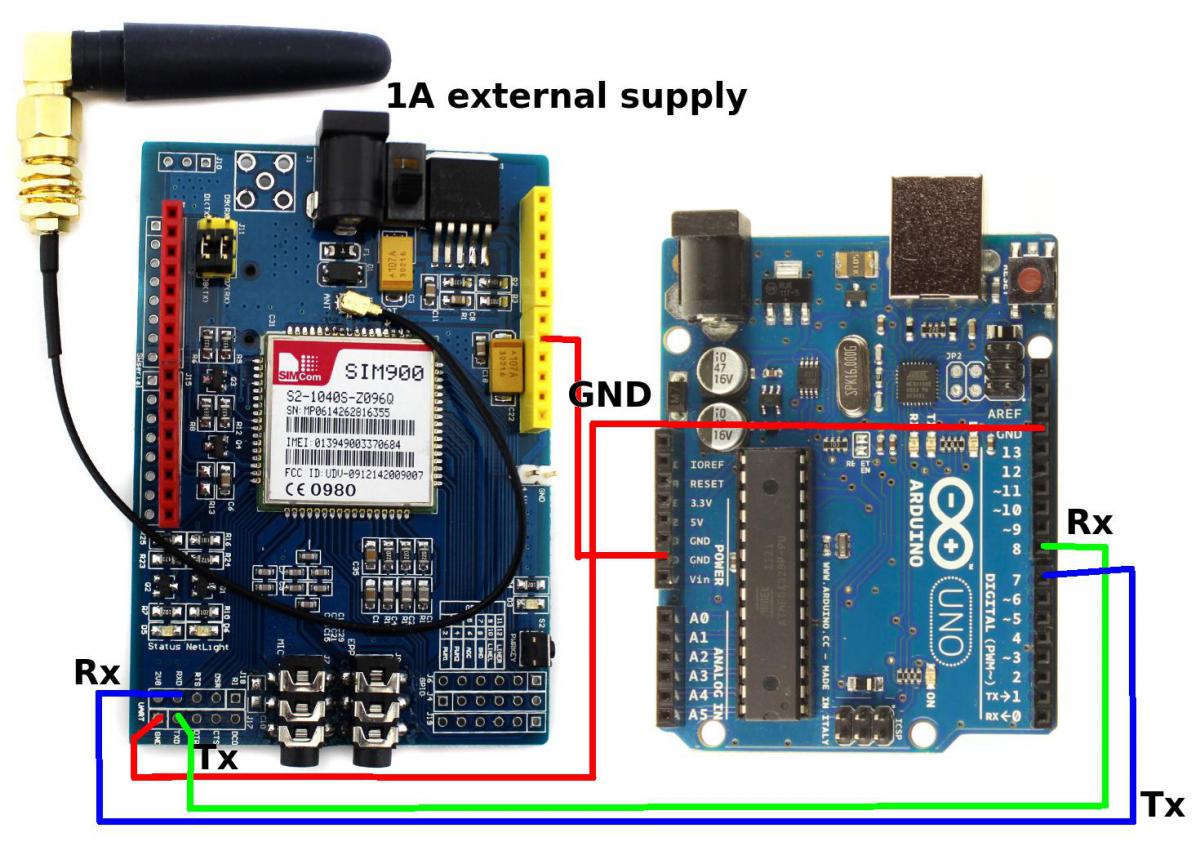
    •  Hardware Serial - D0/D1 of Arduino
    •  Software serial - D7/D8 of Arduino
    •  Status LED - tell whether the power of SIM900 is on
    •  Net light - tell the status about SIM900 linking to the net
    •  UART of SIM900 - UART pins breakout of SIM900
    •  Microphone - to answer the phone call
    •  Speaker - to answer the phone call
    •  GPIO,PWM and ADC of SIM900 - GPIO,PWM and ADC pins breakout of SIM900
    •  Power key - power up and down for SIM900
    • Dimensions: 71.4mm X 66.0mm X1.6mm

    aeProduct.getSubject()
    Specifications:

    Application Ideas:

    · M2M (Machine 2 Machine) Applicatoions.
    · Remote control of appliances.
    · Remote Weather station or a Wireless Sensor Network.
    · Vehicle Tracking System with a GPS module.

    SIM900 Arduino library with examples:

    http://www.hobbyist.co.nz/sites/default/files/sim900/GSM_GPRS_GPS_IDE100_v307_1.zip

    Wiring to Arduino

    If you want the arduino to send SMS or connect to the GPRS network, this is the module for you. It can be used for applications like vehicle tracking, weather baloonsor even sending data from your weatherstation to your mobile as a SMS.

    Arduino gsm, arduino gprs, modem gsm, arduino sim900,gsm modul, gsm tutorial, gprs modem, arduino sms,sms modem, arduino web, arduino internet, usb gsm,sms shield, arduino 3g, arduino sim

    Catalog: 

    Price: $79.00

    WiFi Switch: Turn your kettle on from your mobile

    Description: 

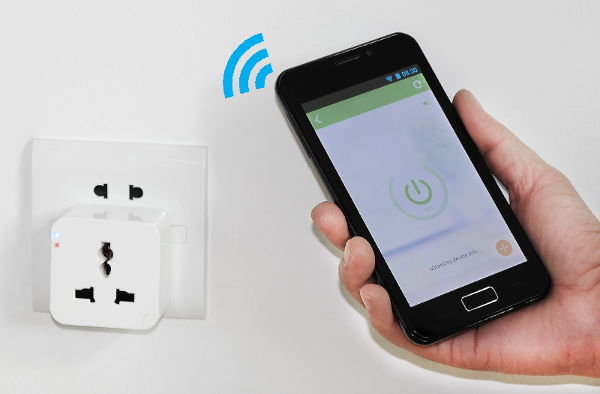
    There isn't a cleaner way to control something through the internet than using this WiFi Universal Power Adapter. It's super easy to setup and use. Think off things you can control on/off by your cellphone, or computer , usage of this plug is only limited by your imagination.

    Plug in the device you want into this socket and you are free to turn it ON from anywhere with your phone.

    The app is designed to allow adding multiple sockets in your house and label them "Kettle", "Lights", "Heater" etc 

    Effectively with this device you have the control of you entire home right in your pocket.

    Control web, server control, web based,control application, iot, internet of things, power ethernet, wireless switch, power outlet control, phone controlled, app controlled, home automation, ip power, light remote, control switch, switch internet, pdu, remote pdu, remote outlet, network controlled, power outlet control 

    Catalog: 

    Price: $59.99

    Breadboard Power Supply USB - 5V/3.3V

    Description: 

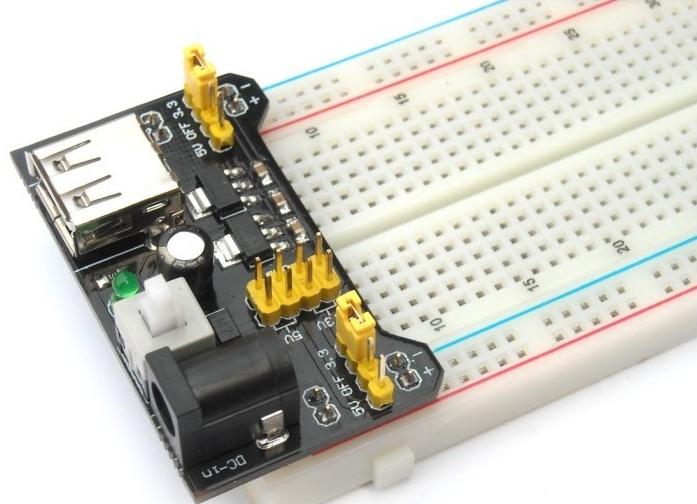
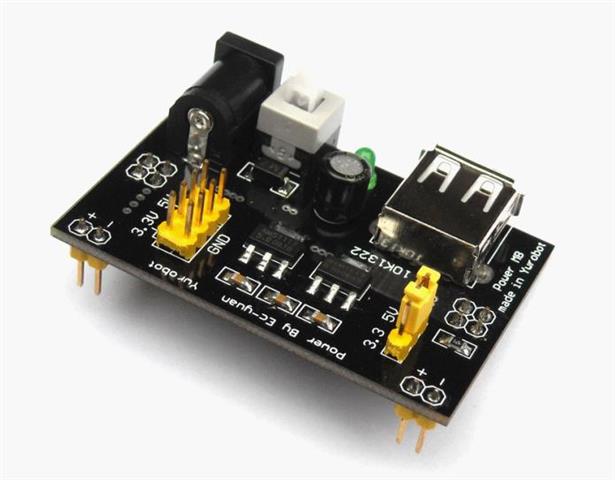
    This is a must have for anyone who uses breadboard to prototype their projects. This module has made life a lot easier, it has fused protected 5V and 3.3V power supply avaiable, you can simply power your circuit from a computer, or a portable  power bank. This module should be a very nice add-on to your electronic toolbox.


    Specifications: 
    • Input voltage: 6.5-12 V (DC) or USB power supply
    • Output voltage: 3.3V or 5V (selectable)
    • Maximum output current: <700 ma Two independent selectable output channels
    • Size: 53 x 32 mm
    • Net weight:12 g
    • Package weight:22 g
    • Main Color:Black
    • Packing Content: 1 x Breadboard Power Supply USB Module

    Catalog: 

    Price: $18.99

    Pages

    Zircon - This is a contributing Drupal Theme
    WeebPal