Arduino Internet Web Switch
This wonder kit allows you to control any electric appliance from the internet.
What does that mean ?
It means you can turn ON/OFF any appliance at your home from your iphone, Android, ipad, PC or laptop from Anywhere in the world..As long as you have access to a web browser.
Woooo..aint that an amazing power to lay your hands on.
What would I do with a Web Switch ?
I would do these:
-
Boil water for my coffee right from my bed with my Iphone
-
Turn on my Home heatpump when I leave to home from Work & My home is warm and cozy by the time I arrive :)
-
Open my garage door from my phone without even stepping out of my car
-
Water my garden when I am on vacation
-
Rest I leave to your creative imagination to fill in...
What does the kit consist of ?
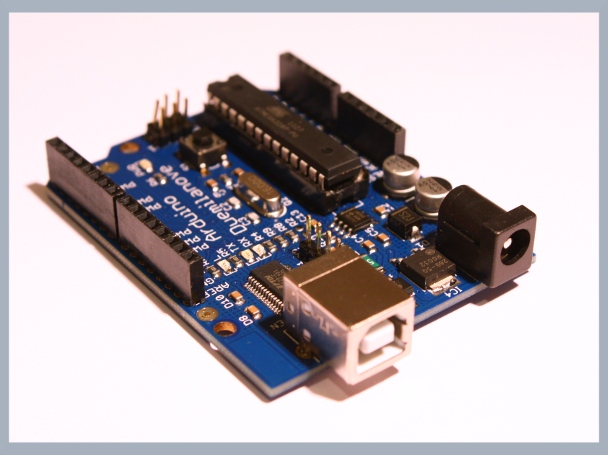
- Arduino UNO
- This is the CPU where the code and the webserver runs
- Ethernet shield
- This shield allows the Arduino to talk to any other device connected via Internet.
- The shield has an ethernet port which will be later used to connect the ethernet cable.

- Sensor Shield
- This shield provides modular plugins to connect loads of things you want to control
- For this example we will interface a Relay module to control power appliances

- Relay Module
- This module allows the Arduino to turn ON/OFF power appliances
- Read more about relays here

Building the Arduino Web Switch
Stacking the shields
Place the Arduino at the bottom as below
Plug the Ethernet Shield on top of the Arduino ( this is also called stacking , as we keep building a stack of shields above the Arduino )
Once thats done it would look like this.

Next step is to stack the height extender pins into the Ethernet shield ( This is necessary to ensure we dont short circuit the sensor shield pins on to the Ethernet shield )
Once the height extender pins are plugged into the Ethernet shield it will look like the pic below:

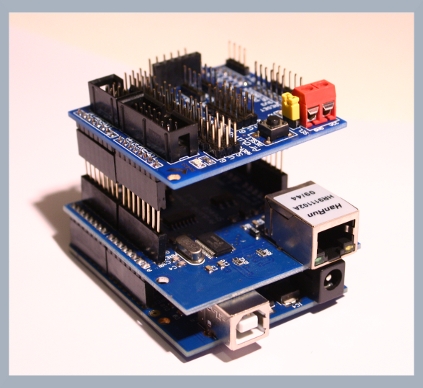
Stack the Sensor Shield on top of the Ethernet shield, as shown in pic below.
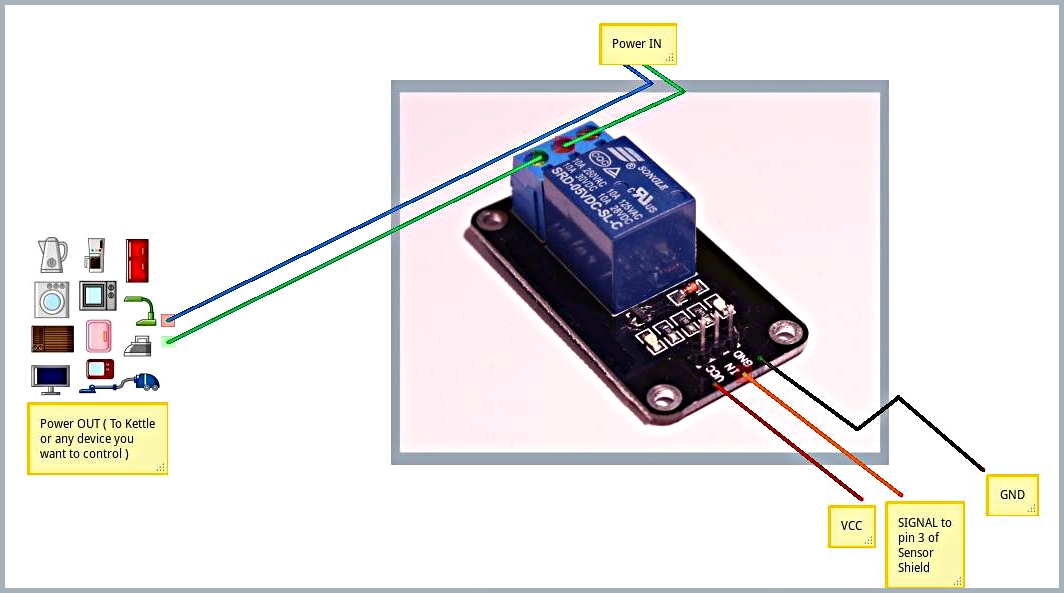
Wiring the Relay Module
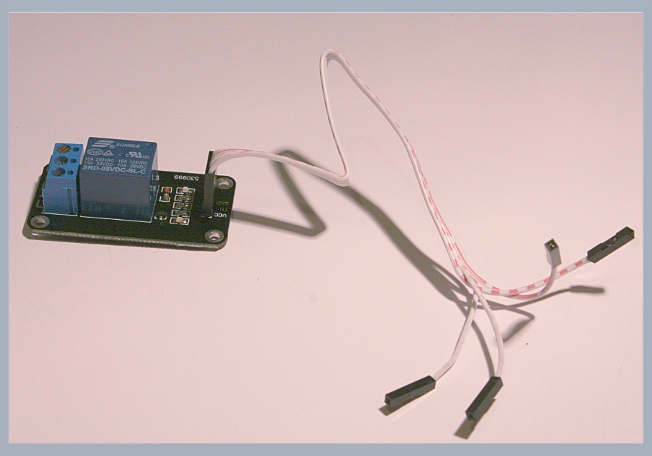
Use the cable provided and connect it to the relay module as shown below
Connect the other end to the Sensor shield pin number 8, VCC and GND
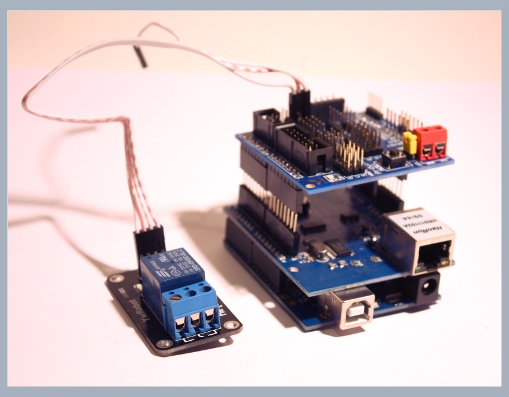
TEST: Power up the arduino and you should see the GREEN led on relay module glowing. If you dont see that revisit your wiring and make sure everything is correct.
Arduino IDE
Install the IDE from the link here:
https://www.arduino.cc/en/software
Relay testing
We are about to test if the wiring is good and the relay turns ON and OFF.
Load this program into the arduino from this link.
What does this program do?
This program turn ON the RELAY module for a 3 secs and turns it OFF for another 2 secs and keeps doing that.
How do you know if the relay is turning on?
You hear a click every time the relay operates and you see the RED led glowing every time it is turned ON.
This test should test if the wiring it good and the arduino is able to control the relay.
Getting your Internet Web Switch to go.......
Now that all the modules are tested, we are almost there..
The last bit which needs doing is to load the Web Switch code and turn your kettle on!
Follow the steps below in order
-
Connect a Ethernet cable from the Arduino Ethernet shield to your PC/Laptop
-
Load this code (link provided on purchase) onto the Arduino.
-
Open up your favorite browser and copy this address onto it:
You will see the webpage shown below on the browser. This page is hosted on your Arduino,
yes that tiny little piece of hardware can host a webpage :)
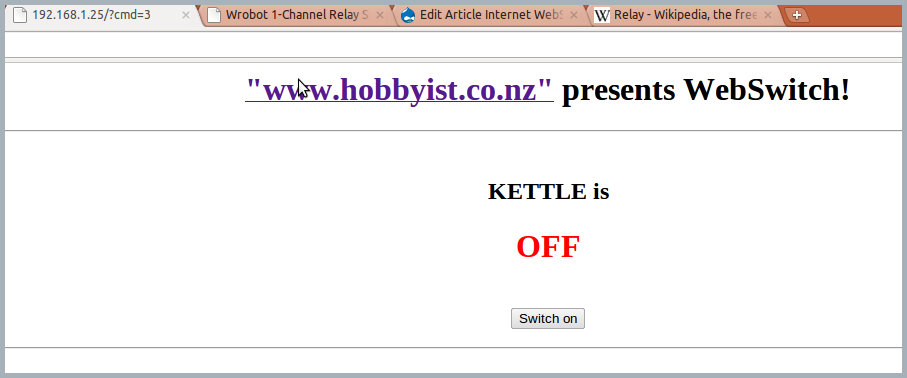
Now you can click the button on the page and hear your relay turn ON/OFF,
You are now able to control the Arduino via the Browser.
Turning the kettle ON!
Now we have a working Arduino Web Switch which can be controlled from a browser,
To control the Kettle you will need to connect the Relay as a switch for the Kettle.
Disclaimer: any modification work that involves high voltages should be done by a certified electrician. This Web Switch kit is provided by Hobbyist Ltd "as is" with no warranty of any kind whatsoever. It is your responsibility to ensure your safety and proper functioning of your devices and applicances. Should you have any concern about health and safety please consult a professional for advice.
The wiring is as below:
VIDEO of the completed kit in action
NOTE: This kit set and code example is tested and works with the ethernet shield we provide with the kit and does not always work with other off the shelf ethernet shields
FAQ:
1. I am not able to access the http://192.168.10.2 from my PC?
A.This means the web switch is not in the same ip address as your PC
In that case follow the below steps
- Find the ip address of your PC using the instructions on this link
- Lets say for ex: your PC ip is 192.168.10.32, then we will set the webSwitch ip to 192.168.10.33 ( ie one more than your PC's ip )
- Set the ip in the Arduino code: