Having problems with memorising the password? Forgetting the combination code?
With the Fingerprint Sensor Kit you can protect your treasures or secrets using your biometric ID.
Our Kit in action - Biometric Door Lock:
Kit comes with:
1. Arduino Nano
2. Relay Module
3. Electromagnetic door lock
4. OLED display
5. Cables to connect the arduino and relays
6. Biometric sensor
7. User feedback buzzer
We are first going to set up the fingerprint sensor device.
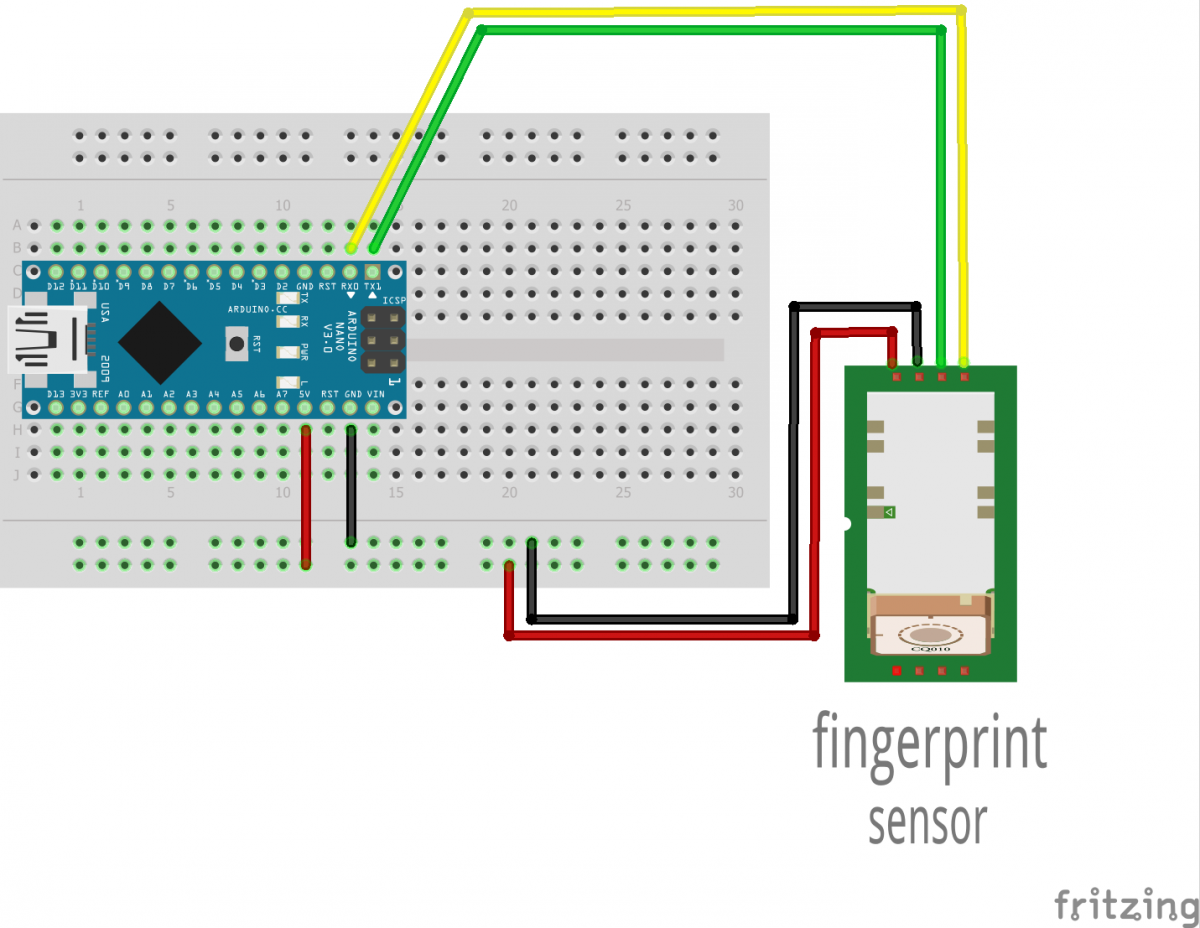
To use the fingerprint sensor with the PC (Windows system only), let’s start by connecting the power supply:
- Connect the 5V pin from the Arduino board to the red power rail
- The GND from Arduino the blue power rail on the breadboard.
Now, let’s connect the fingerprint sensor.
- First, connect the power, by connecting the cables to their respective colors on the breadboard: Red to +5V rail, Black to GND rail
- Then, connect the yellow wire from the sensor to Arduino pin RX0
- & the green wire to pin TX1
NOTE: There are 2 variants of the Fingerprint sensors, if you get a sensor with all RED wires, look below for wiring details:
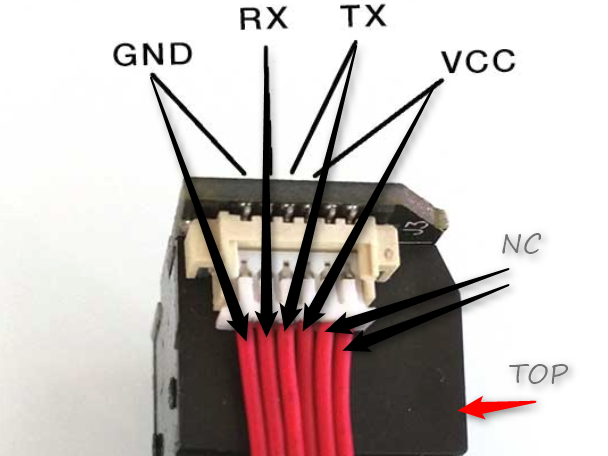
Wiring details for all redwire fingerprint sensor:
Yellow wire to Tx of fingerprint sensor
Green wire to Rx of fingerprint sensor
Black to Ground
Red to 5V
Open your Arduino IDE and upload the following sketch:
// this sketch will allow you to bypass the Atmega chip
// and connect the fingerprint sensor directly to the USB/Serial
// chip converter.
// Red connects to +5V
// Black connects to Ground
// Yellow goes to Digital 0
// Green goes to Digital 1
void setup() {}
void loop() {}
To work with the sensor,
you need GUI software called “SFGdemo” or “SYNOdemo” – download the software
from here (link). You can find many online tutorials how to use the software.
Here is one:
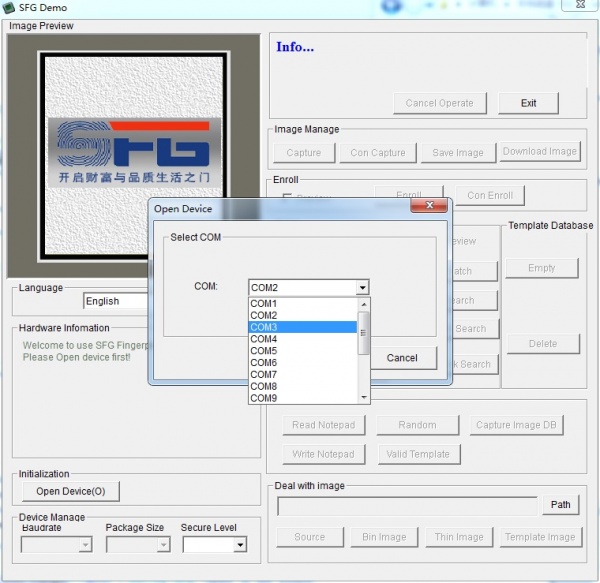
Close the Arduino IDE, start up the “SFGdemo” or “SYNOdemo”, click “Open Device” and select the COM port used by the Arduino.
NOTE: to find the Arduino COM port number, click START>Control Panel>System and Security>Device Manager. In Device Manager, expand Ports (COM&LPT), unplog the Arduino, and than plug the Arduino back in and see which port appears - this is the Arduino COM port
so, select the COM port used by the Arduino
Press OK and after few seconds you should see a blue success message and some device information.
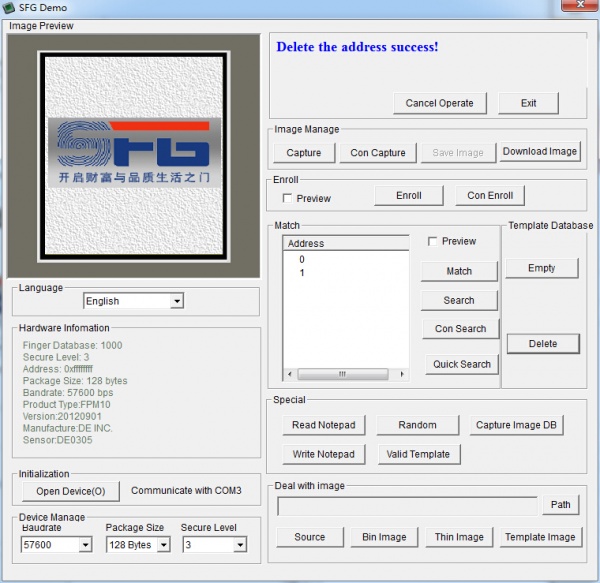
Let’s enroll a new finger.
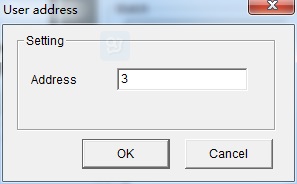
Tick the Preview checkbox next to the Enroll button, and press the button.
When the box shows up, enter in the ID# you want to use for your finger print
(you can set up to 162 ID numbers), press OK.
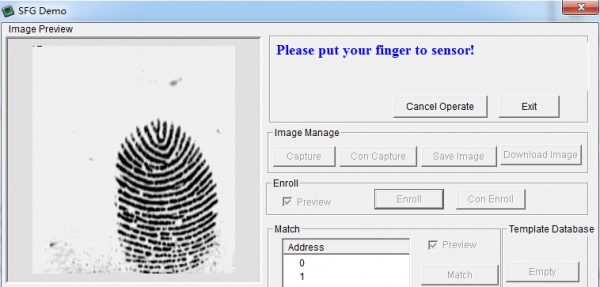
The software will ask you to scan your finger.
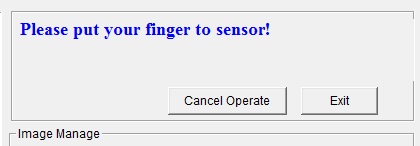
Follow the instructions,
and after few seconds (serial transmission delay) you can see a preview of your finger print.
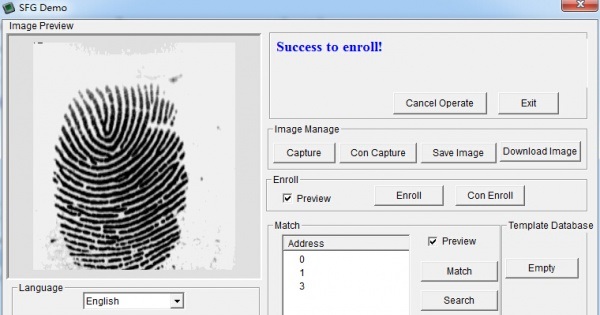
You will then have to repeat those steps to get a second clean print for confirmation.
Use the same finger!
You will need to repeat the process if you get an error or issue with the bad print.
Now, let’s search (scan) the finger and see if we find the match.
First, click the Search button.
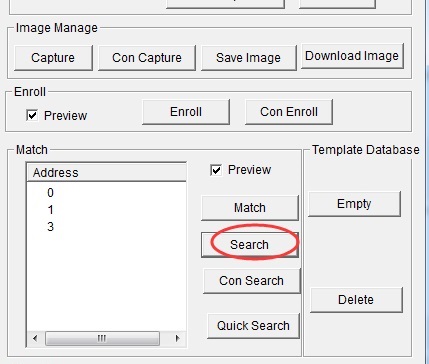
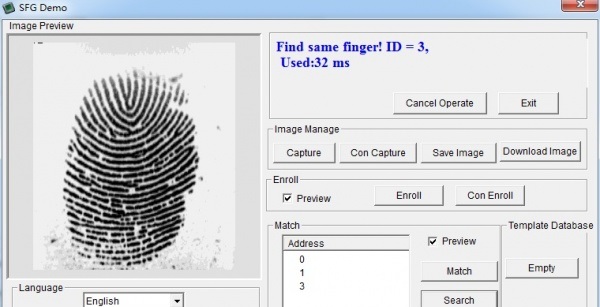
When prompted, put the finger on the scanner, if the finger is the same finger, you should get a match with the ID#.
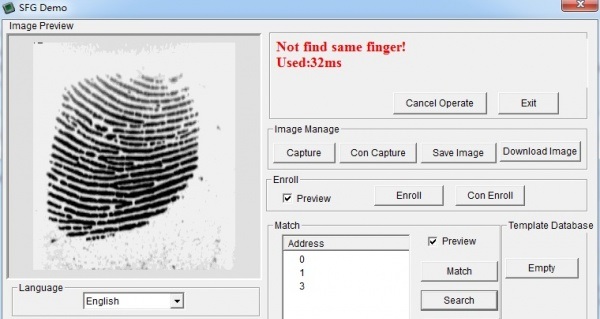
If it is not the same finger, you will get a failure notice.
Simple, right!
With this software, you can delete existing one or enroll new fingers ID#
Add as many persons (fingers ID#) as you want, we will use those finger ID#
with our next steps…