Introduction:
Water is needed for the fundamental growth of plants. When sufficient amount of water is not present at the time of plant needs, then eventually the plant can prompt lessened quality or demise. Since it is very hectic for human to look after plants all the time, engineers designed soil moisture sensors to lessen the burden. Now using the sensor system designer can build any types of system that can look after the water needs of plant.

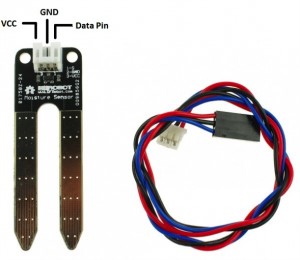
Sensor description:
This soil moisture sensor has two probes through which current passes in soil, then read the resistance of soil for reading moisture level. We know that water make the soil more prone to electric conductivity resulting less resistance in soil where on the other hand dry soil has poor electrical conductivity thus more resistance in soil. Using these properties of electricity the sensor is designed. Inside the sensor there are circuitry for measuring the resistance and converting it into voltage as output.
Features:
- Supply voltage: 3.3v – 5v
- Output voltage: 0- 4.2 v
- Current: 35mA
- Low power consumption
Application:
- Irrigation controller
- Gardening
- Water sensor
Parts:
- Arduino uno (1pc)
- Soil moisture sensor
- Analog sensor cable (3 pin)
Pin configuration:
Wiring:
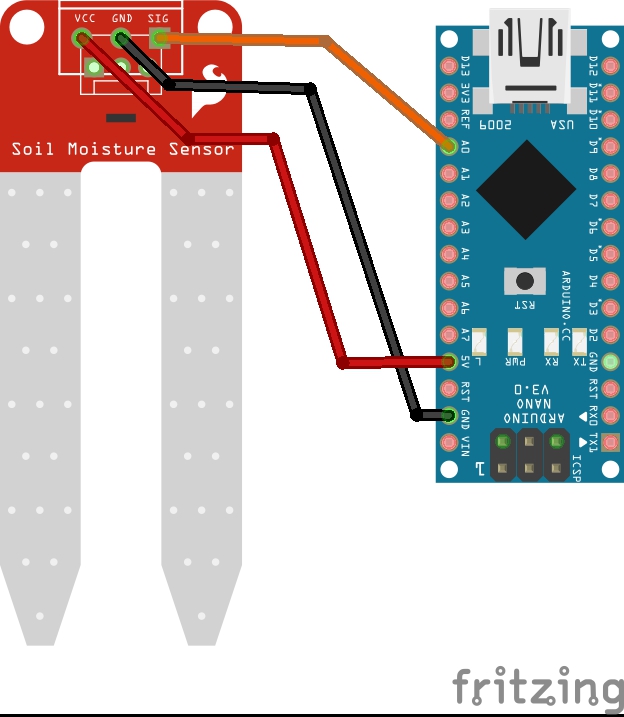
|
Arduino |
Soil Moisture sensor |
|
A0 |
S (pin 3) |
|
5V |
VCC (pin 1) |
|
GND |
GND (pin 2) |
For this sensor no extra circuit is not required to construct so the data pin of soil moisture sensor which is pin 3 is directly connected with arduino uno’s analog I/O pin. In this project this pin is connected with arduino uno’s analog pin A0. However the question arises as to why analog pin? The reason behind using analog I/O pin is because the sensor provides analog voltage as output. Since arduino uno has analog-to-digital converter (ADC), it saves the hobbyist from hassles. Arduino uno do all the task using analogRead() function and show analog value.
Code:
int sensorPin = 0; // select the input pin for the soil moisture sensorint sensorValue = 0; // variable to store the value coming from the sensorvoid setup() {// declare the ledPin as an OUTPUT:Serial.begin(9600);}void loop() {// read the value from the sensor:sensorValue = analogRead(sensorPin); delay(1000);Serial.print("sensor = " );Serial.println(sensorValue);}
The above code to take the soil mositure reading and display it on the serial monitor.
Getting the water pump and relay going with Arduino
Getting the complete Automatic watering system with pump and sensors