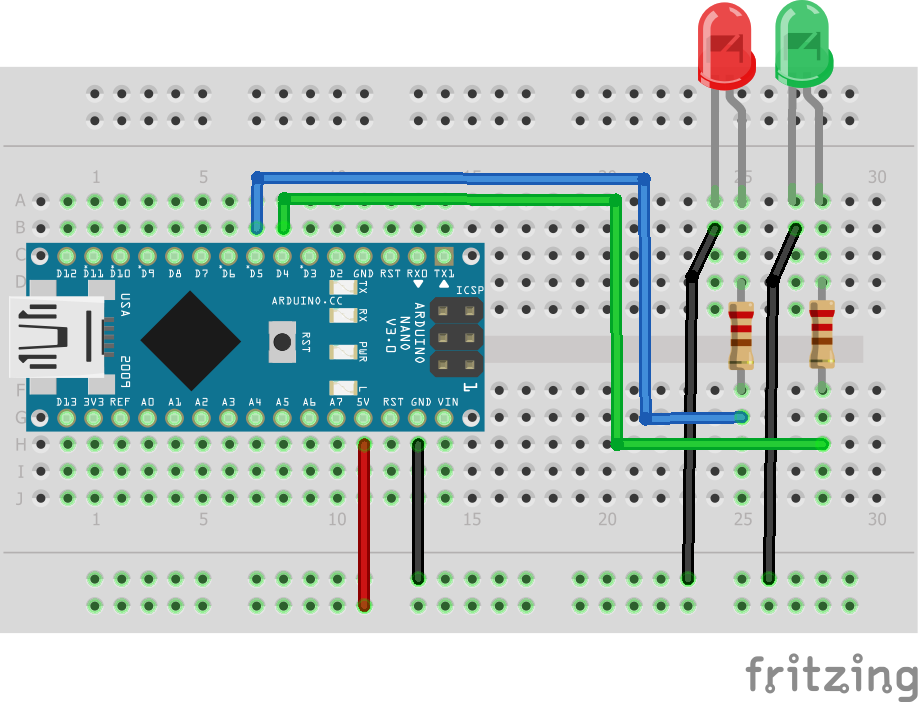
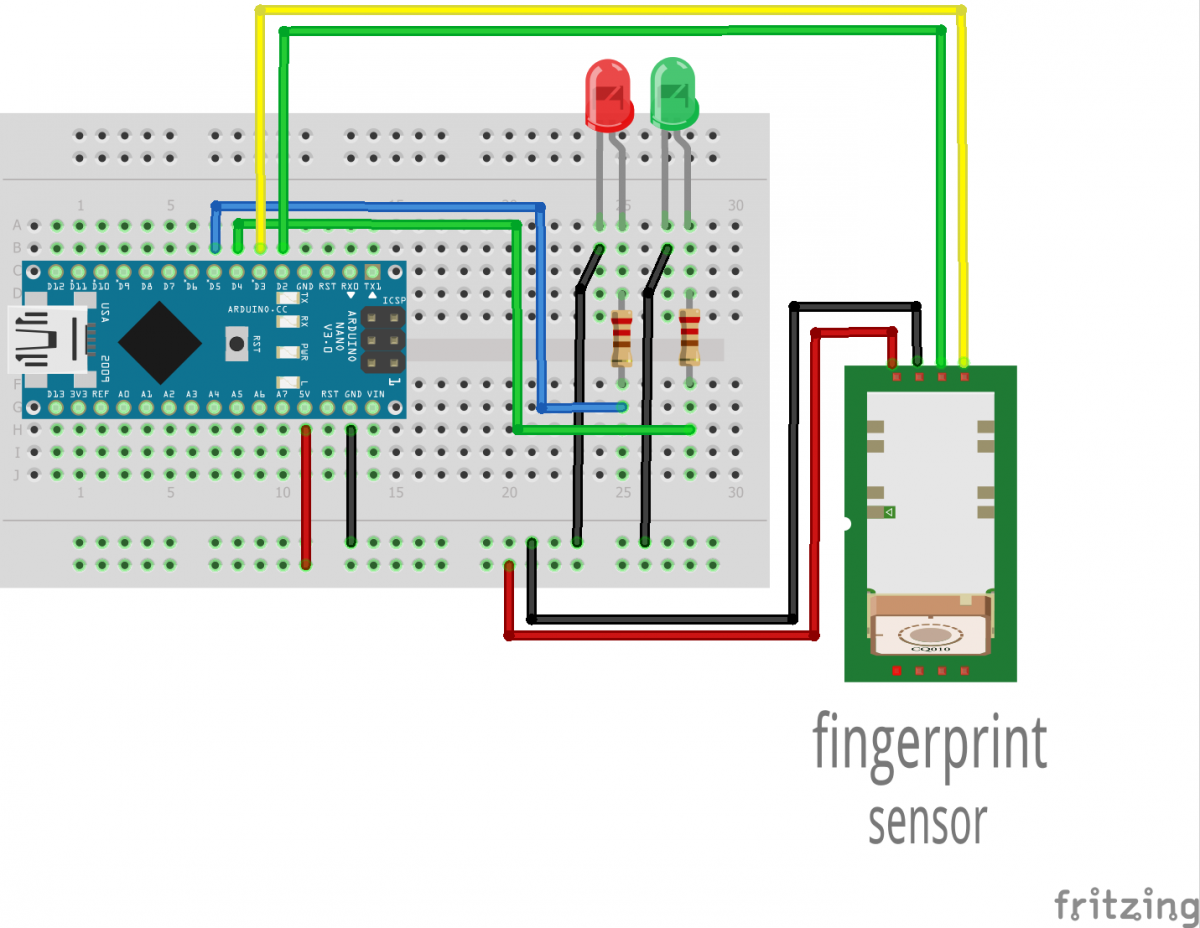
Then, connect the fingerprint sensor to the Arduino Nano (note: yellow wire to port D3, green wire to port D2).
Then, connect the relay to port D6
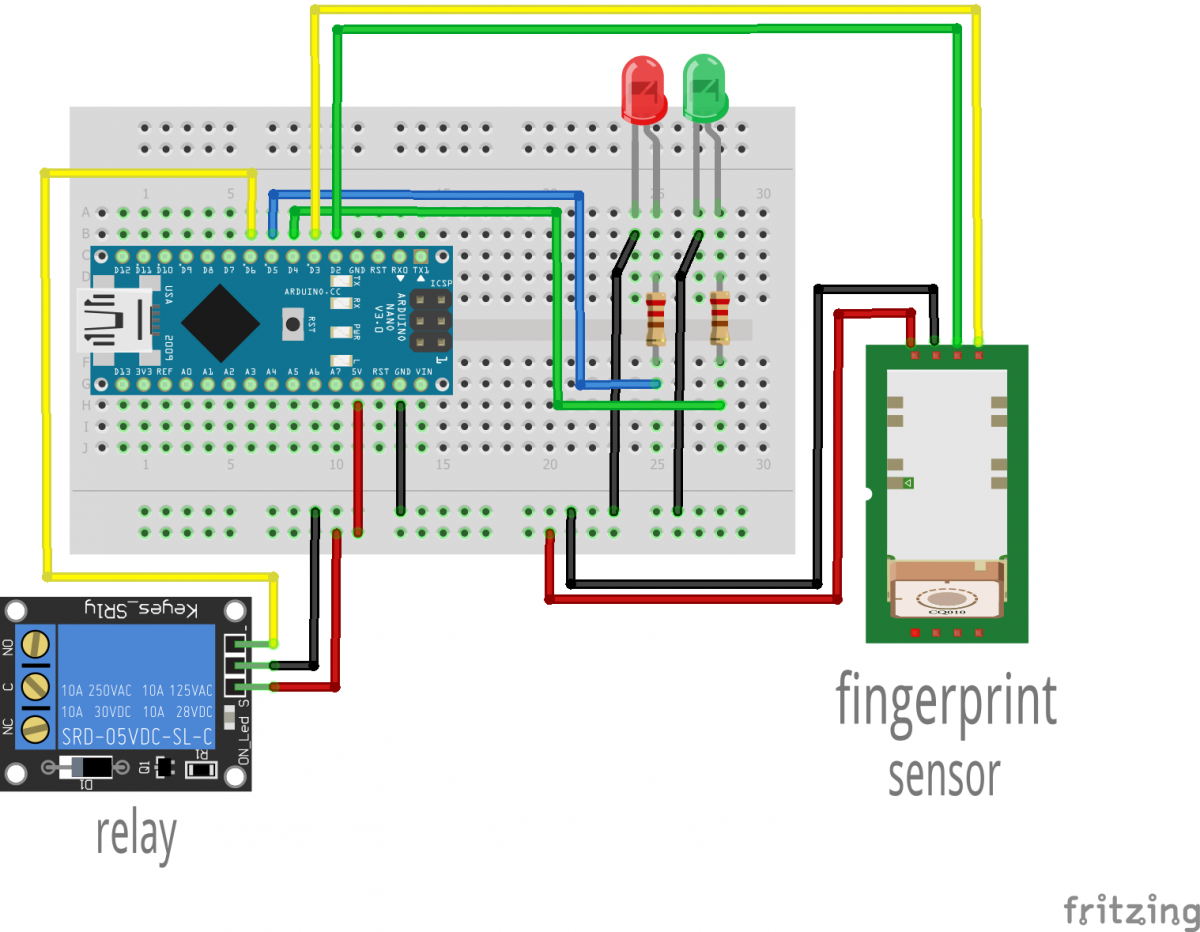
We will start from testing the relay connection.
Open your Arduino IDE and copy the following sketch (link):
/*
Blink
Turns on the relay for one second,
then off for one second, repeatedly.
*/
int relay = 6;
// the setup function runs once when you press reset or power the board
void setup() {
pinMode(relay, OUTPUT); //set relay pin as output
}
// the loop function runs over and over again forever
void loop() {
digitalWrite(relay, HIGH); // turn ON (HIGH is the voltage level)
delay(1000); // wait for a second
digitalWrite(relay, LOW); // turn OFF by making the voltage LOW
delay(1000); // wait for a second
}
All done.
If the connection is correct – you will hear “click” every second indicating the relay
switching ON and OFF repeatedly. So far so good…
Let’s make next step,
we will use our previously pre-programed fingers ID# to play with the LEDs; the correct
finger will switch the green LED ON, incorrect finger will switch the green led OFF and
activate the red LED.
Open your Arduino IDE and copy the following sketch (link):
#include <Adafruit_Fingerprint.h>
#include <SoftwareSerial.h>
int getFingerprintIDez();
int GreenLed = 4;
int RedLed = 5;
int Relay = 6;
// pin #2 is IN from sensor (GREEN wire)
// pin #3 is OUT from arduino (YELLOW wire)
SoftwareSerial mySerial(2, 3); //activates serial communication on pin 2 & 3
Adafruit_Fingerprint finger = Adafruit_Fingerprint(&mySerial);
void setup()
{
Serial.begin(9600); // initialize the serial communications:
pinMode(4, OUTPUT); // set pin 4 as output. green LED connected
pinMode(5, OUTPUT); // set pin 5 as output. red LED connected
pinMode(6, OUTPUT); // set pin 6 as output. relay connected
finger.begin(57600); // set the data rate for the sensor serial port
digitalWrite(RedLed, HIGH);
digitalWrite(Relay, LOW);
}
void loop() // run over and over again
{
getFingerprintID();
delay(100);
}
uint8_t getFingerprintID()
{
uint8_t p = finger.getImage();
switch (p)
{
case FINGERPRINT_OK:
Break;
case FINGERPRINT_NOFINGER:
return p;
case FINGERPRINT_PACKETRECIEVEERR:
return p;
case FINGERPRINT_IMAGEFAIL:
return p;
Default:
return p;
}
p = finger.image2Tz();
switch (p)
{
case FINGERPRINT_OK:
Break;
case FINGERPRINT_IMAGEMESS:
return p;
case FINGERPRINT_PACKETRECIEVEERR:
return p;
case FINGERPRINT_FEATUREFAIL:
return p;
case FINGERPRINT_INVALIDIMAGE:
return p;
Default:
return p;
}
// match finger with stored ID#
p = finger.fingerFastSearch();
if (p == FINGERPRINT_OK)
{
digitalWrite(GreenLed, HIGH); //turn on green LED and Relay if finger ID is match
digitalWrite(RedLed, LOW); //red LED is OFF
digitalWrite(Relay, HIGH);
}
else if (p == FINGERPRINT_NOTFOUND)
{
digitalWrite(GreenLed, LOW); //turn off green LED and Relay if finger do not match
digitalWrite(RedLed, HIGH); //red LED is ON
digitalWrite(Relay, LOW);
return p;
}
Else
{
return p;
}
}
// returns ID#
int getFingerprintIDez() {
uint8_t p = finger.getImage();
if (p != FINGERPRINT_OK) return -1;
p = finger.image2Tz();
if (p != FINGERPRINT_OK) return -1;
p = finger.fingerFastSearch();
if (p != FINGERPRINT_OK) return -1;
}
Using previously enrolled fingers, you can switch the LEDs ON and OFF.
Great.
<<Prev : Adding fingerprints to the reader The complete Biometric lock: >>Next