Using the IR viewer
Now we are ready to construct a thermal image. Download InfraEye HeatMap Viewer Java app and save it somewhere convenient where you can use it from the command line.
From a Command Prompt or terminal window change into the directory where you have the HeatMap.jar file. If you are using Windows, start the viewer with the command
The Heat Map Frame window should open and construction of an image should begin, starting from the top right corner. You'll also notice the servos spring into life. The window will output servo X and servo Y coordinates along with temperature values in similar vein to what you saw in the Arduino serial monitor window:
OldLine: 36.00,173,135
Good Line: 36.00,173,135
36.00 173 135
Data[103][25]=1.0285715
New Data 17.00,172,135
OldLine: 17.00,172,135
Good Line: 17.00,172,135
17.00 172 135
Data[102][25]=0.4857143
New Data
18.00,171,135
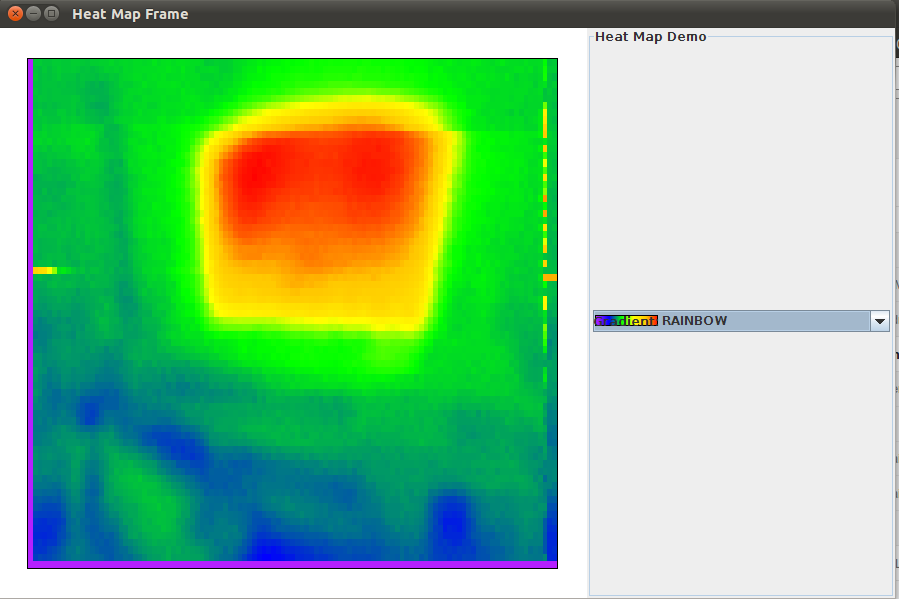
The image takes roughly 40 minutes to construct. When finished the servos will reset back to the start and image reconstruction will begin again. This will, pixel by pixel, over write the image so be sure to turn off the Arduino in time. Here is an example image:

You can change the colour gradient to a colour scheme of your liking using the drop down menu.
To save the image, a simple screen shot will work well. Simply press the Print Screen key on your keyboard. Depending on whether you have Linux or Windows, this will either save the image into your Pictures folder or save it to the clipboard. A graphical editor such as GIMP or MS Paint can be used to trim the image accordingly.
Diagnostics and Tips
Servos not moving or stop moving
Check servo connectivity and also ensure the Temperature sensor is wired correctly. The best way to check this is to close the Java app and open an Arduino IDE Serial terminal at 57600 baud and confirm you are seeing something like this below
20.22,180,110
20.28,179,110
20.28,178,110
20.30,177,110
20.12,176,110
19.98,175,110
Image Suddenly Changes Brightness
It's important that while an image is being constructed not to bring any sudden heat sources in view of the IR sensor, such as a person walking in front of it. If this happen you'll notice the whole image will change to reflect the sudden rise in heat.
No Image Being Displayed
If you do not see an image being built and you see output similar to this:
Init SerialConn
In periodic timer
In periodic timer
...
then there may be a connection problem between the Arduino Nano and the computer.
It may be that the correct COM port or /dev/ path has not been specified as mentioned above. Please ensure that the correct path to the Arduino is specified.
Wires Too Tight
Please ensure there is always enough slack in the wires between the servos and the breadboard. When the servos are operating there is the possibility of them being pulled on. While this is unlikely to cause any damage, it may interfere with the servo operation and cause an inaccurate heat image to be constructed.
Servos moving Randomly or has jittering movement
When the servos seem to act as if they are without control check the breadboard power supply is turned on. If only the USB cable is plugged in between the Arduino and your computer, the servos will be trying to draw power via the USB port and this will not be enough. The breadboard power supply needs to be used to drive the servos properly.
Back to: Setting up the software