We're almost done. All we need to do now is setup the solenoid valves (figure 1). These are devices that allow on/off control of the flow of fluids. This is done by means of a solenoid. More about solenoids here. Long story short, they allow you to control the flow of water to your plants using small current electrical signals just like the one provided by the Arduino. Two valves, two pins, simple as that.
Whoa, Whoa, Whoa. Relays? Arduino? How?
We have that covered riiiiiiight here.
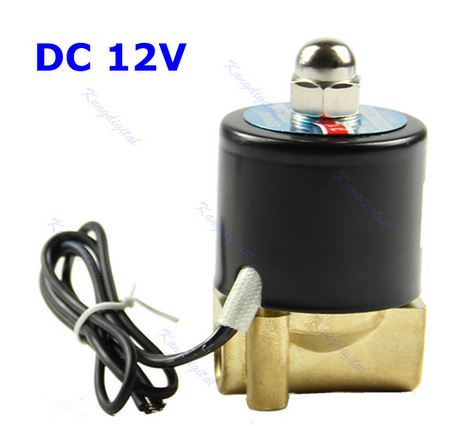
Figure 1
Full schematic of the system is presented in figure 2. Check it out.
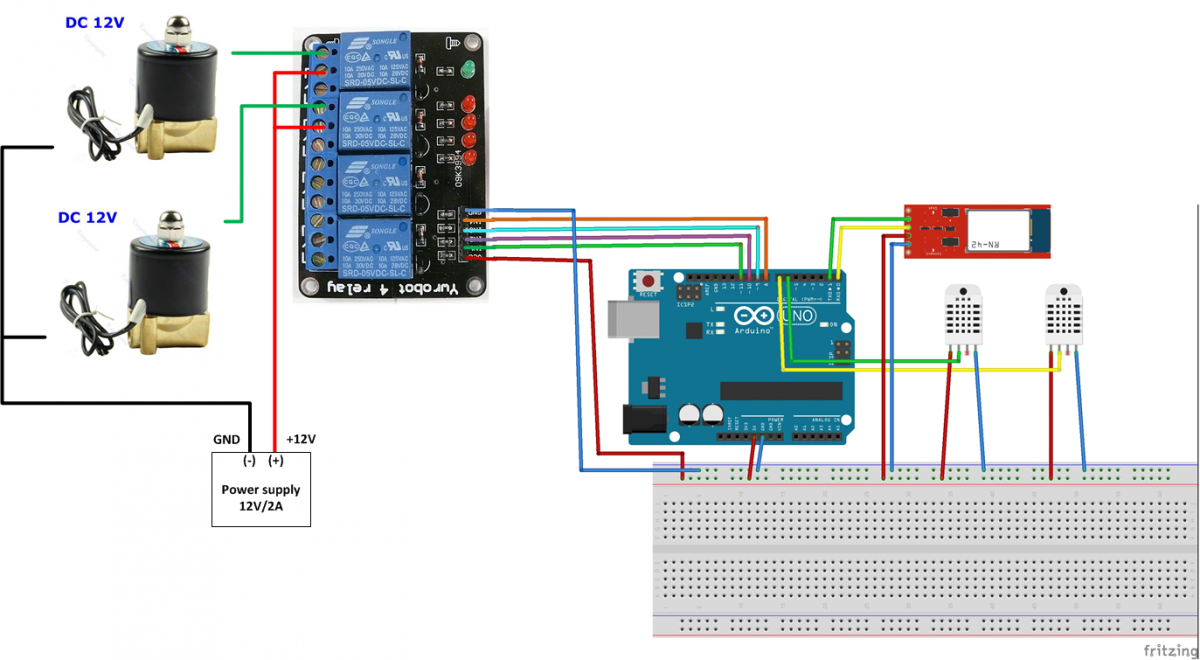
Figure 2
Solenoids don't have polarity, so you don't need to worry about reversing it. However, be careful not to connect both leads to a positive terminal.
You might have noticed a Bluetooth Dongle in Figure 2. That's just to help you stay as far away from the mud and water as possible. Use this to program and monitor your Arduino from a distance. More info about that here.
Please use this Arduino application to test the valves. You should hear them turning on/off every two seconds.
Once that's done, please use this Arduino application to start using the system. Please remember to also start the Processing application (download here).
Time to get a bit serious boys and girls
Before you start the system, we highly recommend re-checking your wiring. Experience has taught us that the simplest mistakes are made by even the most experienced users. Please take care working with this setup. While 12V is not a huge voltage, zapping yourself won't feel good*. Also water and electricity tend to be a bad idea if not handled with care.
*for the first couple of times (joke). Laugh. Haha.