This tutorial details how to use the mini USB servo controller in Windows 7.
1. Plug the mini USB to the computer, and the two LEDs (ON, LED) should turn on, green and red.

2. Once the USB is plugged to a Windows 7 PC, the driver should be automatically installed. Confirm the COM port the servo controller is connected to in device manager. To go to device manager, press the start button, right click on 'computer', and select 'properties'. Then choose 'Device Manager' on the top left corner.

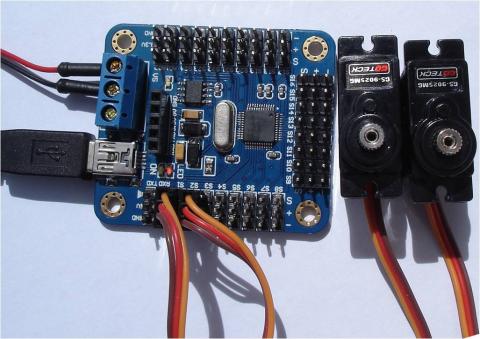
2, it should be noted that the usb doesn't supply any power to the servo, since there are potentially 16 servos, usb has no way of supply sufficient current for that. So an external power source has to connect to the 5v and gnd screw terminals. It doesn't have to be 5v, you can connect whatever voltage you like to supply to the servos, they normally tolerate up to 6v. With the power supply, the 3rd LED will turn on.

3. plug in servos, brown is GND, and orange is Signal.


4, send command from pc. Terminal programs like putty is great if you want to send each character separately as you type on the keyboard, but for the servo controller you better use a terminal program that can send a whole string when you press a button. For example, you can use the Arduino program, open it and select the correct COM from tools-> Serial port

5, open on the serial monitor on the top right corner. On the bottom of the serial monitor, the baudrate doesn't matter, but change the 'no line ending' to both 'NL & CR'.

6, in the serial monitor, you can type command, for example, type #1P1200T1000 and hit 'send button' will it send a 1200 us duty cycle PWM to channel 1 for 1000 ms. If you like to control 2 servos simultaneously, use the command
#1P1200T1000#2P1200T1000
Please note that normally the servo range is from 1000us (+90 degree) to 2000us (-90 degree), with 1500us being the neutral position.