Wiring the Arduino + LCD + DHT11
First of all, you will need to wire the DHT11 sensor and the LCD as shown in the circuit diagram below:
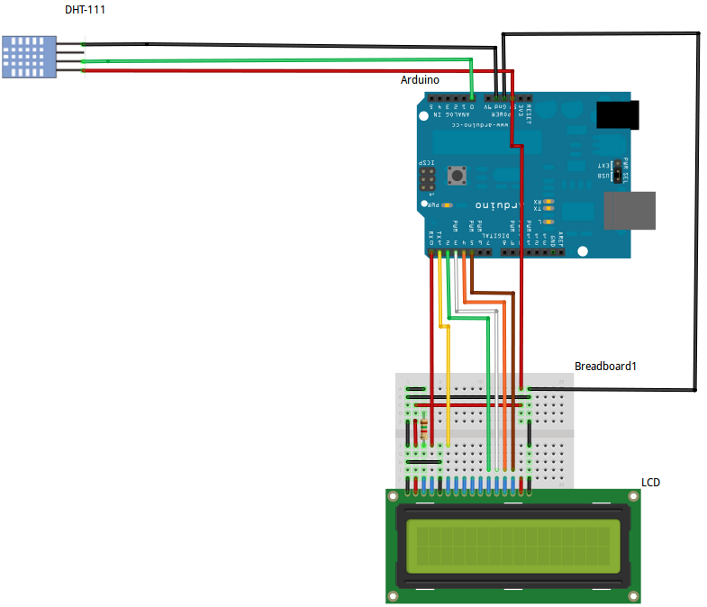
Fig 1: Circuit to wire up the Arduino the LCD and the DHT11 sensor
NOTE: Instread of a fixed resistor show in above diagram a variable resistor is provided for contrast adjustment of the LCD
The code for reading the Sensor data and displaying it on the LCD is available (provided on purchase), The code is very easy to read and understand and you can tweak it to your advantage..
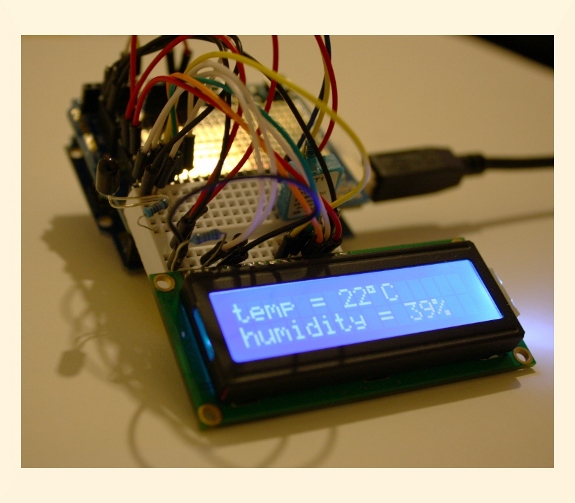
Once the code is loaded the Weather Station should be reading the Temperature and Humidity reading and displaying it on the cool blue backlight screen!!!
GET A WEATHERSTATION!
NOTE: We leave the interfacing of the light sensor as a task for the hobbyist, But if you get stuck drop us a line and we will send you the link to interface it!