DIY Kits

Image: 

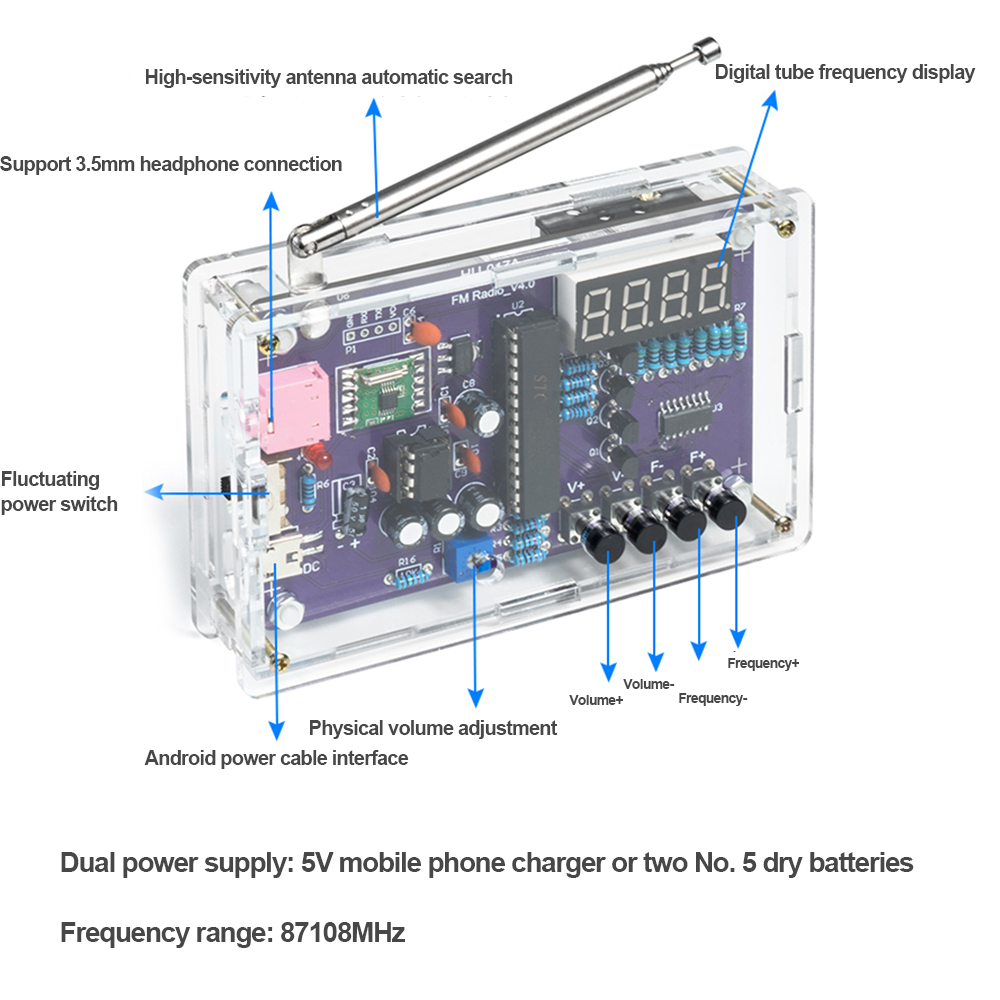
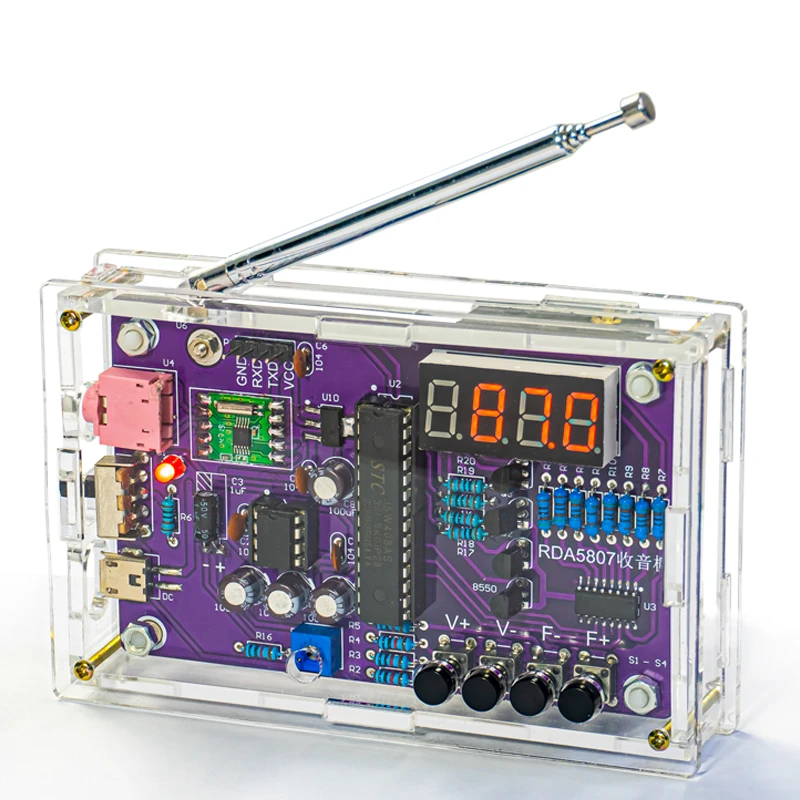
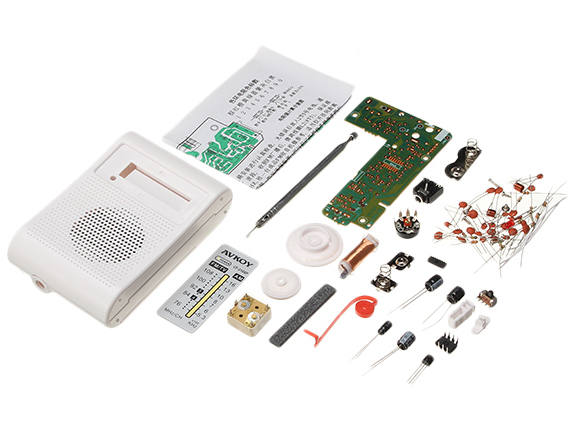
Beautiful DIY FM Radio kit with step-by-step instructions

Description: 

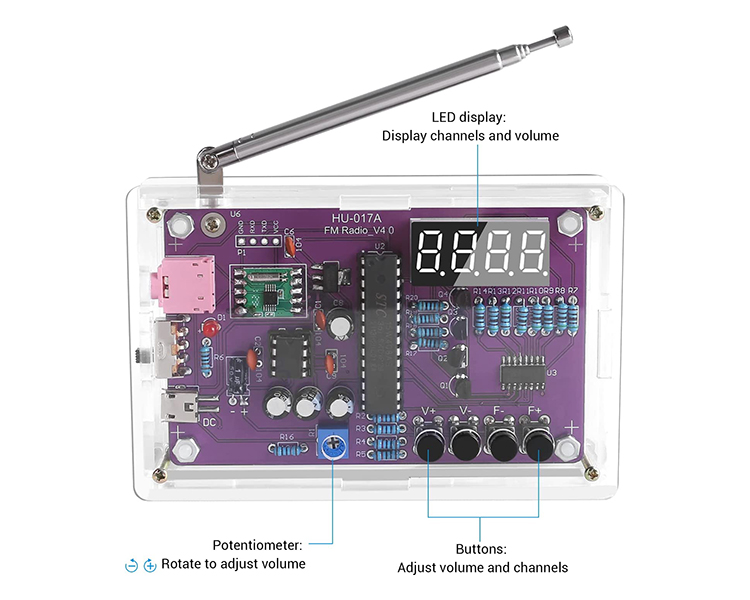
Unleash your inner electronics enthusiast and immerse yourself in the world of radio with our DIY Portable FM Radio Kit! This exciting kit features the RDA5807S radio module, known for its global FM receiving band compatibility and outstanding performance. With noise elimination, soft mute, bass enhancement, high sensitivity, low noise, and strong anti-interference ability, this radio kit offers exceptional sound quality and performance.

The power amplifier in this kit uses the TDA2822 integrated circuit, delivering a simple circuit design, excellent sound quality, and a wide voltage range. The sleek acrylic case not only adds to the aesthetics but also provides portability and protection for your completed project. Plus, with a USB power input (compatible with mobile phone chargers) and a headphone jack, this FM radio is both practical and versatile.


Specifications

Frequency Range: 87-108MHz

Dual Power Supply: 5V mobile phone charger or two AA batteries

What's Included:

1 x DIY Portable FM Radio Kit

1 x Acrylic Case

1 x Assembly Guide and Comprehensive Instructions


Get ready to explore the fascinating world of electronics and radio with this DIY Portable FM Radio Kit. With its eye-catching aesthetics, USB power, headphone jack, and an acrylic case for portability, it's the perfect project for those who love to build and learn.

Building and creating a radio by hand brings great joy and a feeling of achievement, connecting us to the origins of modern communication. As you put together each part, the interaction of capacitors, resistors, and transistors forms an elegant system. This process helps you better appreciate the cleverness and talent behind radio technology and adds a touch of magic to your daily listening experience.

Catalog: 

Price: $69.99

DIY Line-Following Robot Kit with Step-by-Step Assembly Instructions

Description: 

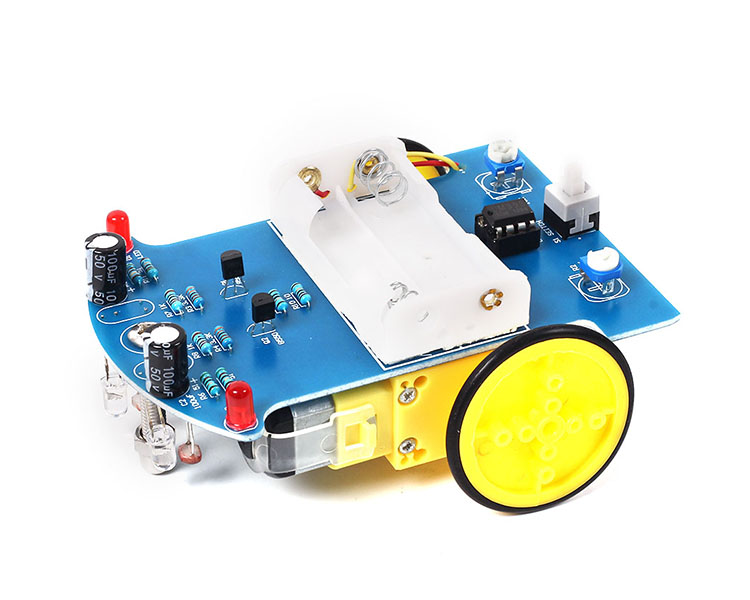
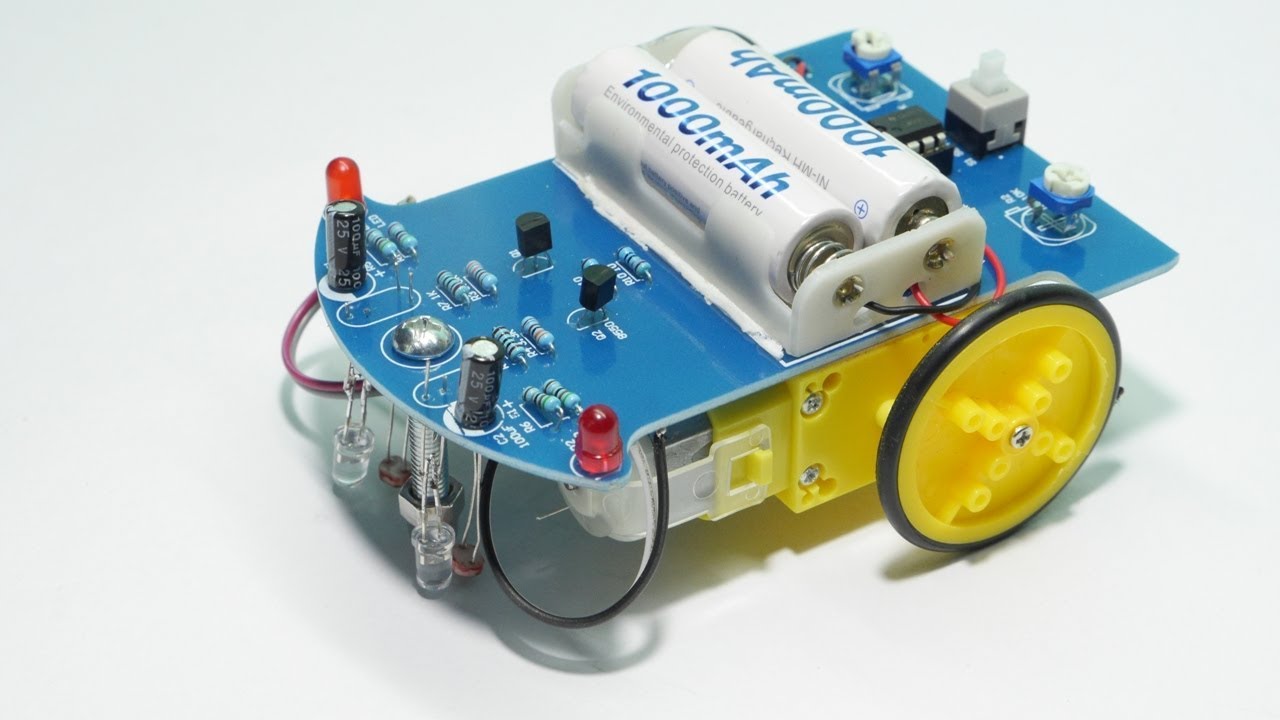
Description: Introducing the Intelligent Tracking Line Smart Car Kit, a fantastic DIY electronic project for Arduino enthusiasts. This kit is designed to help you build a line-following robot that utilizes a photosensitive resistance device and the LM393 dual voltage comparator integrated circuit. Ideal for learning electronics, motor control, and understanding the inner workings of light-sensing systems for locomotion, this kit is perfect for hobbyists, students, and experimenters alike.


Features:

  • Photosensitive resistance device for high sensitivity and stable performance.
  • LM393 dual voltage comparator integrated circuit, featuring two independent precision voltage comparators.
  • Comprehensive smart tracking line car kit with an easy-to-follow assembly process.
  • DC motor with gear reduction for efficient and precise control.
  • Introduces the builder to electronics, motor control, and light-sensing systems for locomotion.
  • Versatile applications, including experiments, industry, school, electronic DIY projects, robotics, and remote control cars.

Specifications:

  • Model: Smart Line Following Robot Kit
  • Colors: Blue
  • Device: Photosensitive Resistance
  • Motor: DC Motor with Gear Reduction
  • Build Instructions link

Package Includes: 1 x Intelligent Tracking Line Smart Car Kit 1 x Assembly Guide

To note this kit requires soldering and standard 2 x AA batteries are required to operate it ( batteries are not included as part of kit )

Bring your electronic skills to the next level and create your very own line-following robot with this line tracking smart car kit, Get one now to get started on your next exciting DIY project.

Catalog: 

Price: $49.99

IOT programming kit for starters ( ESP8266 board )

Description: 

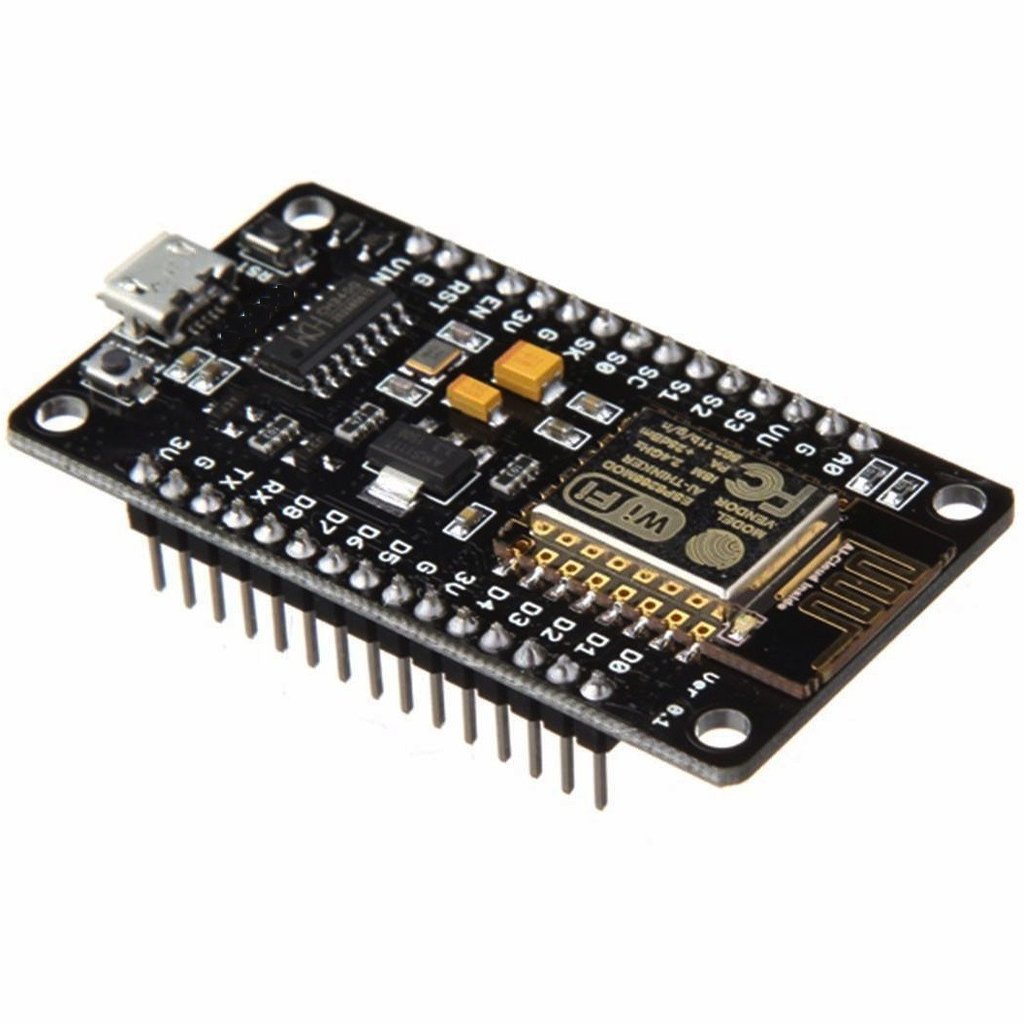
CH340 v3 NodeMCU

Node MCU has revolutionized IOT industry with its simple design and a wide range of features. It is like an Arduino Board with a built-in WiFi module. You can simply program Node MCU (just like Arduino Board) and develop IoT applications. For more enhancements, Node MCU can be directly connected with the Arduino Board.


Main features of Node MCU:

  • Economical and easy to use
  • Open source platform for IoT applications
  • Integrated low power chip
  • Suitable for automation and telemetry projects

NodeMCU CH340 v3 specs:

  • IEEE 802.11 b/g/n Wi-Fi support
  • 32-bit RISC CPU Tensilica Xtensa LX106
  • Built-in LNA, Power Amplifier, TR Switch, and Matching Network
  • 80 MB Operating Frequency
  • 4 MB Flash Memory
  • 64 KB SRAM
  • 1 UART on GPIO2
  • 16 Digital I/O Pins
  • 1 Analog Input Pin
  • 7-12V Input Voltage

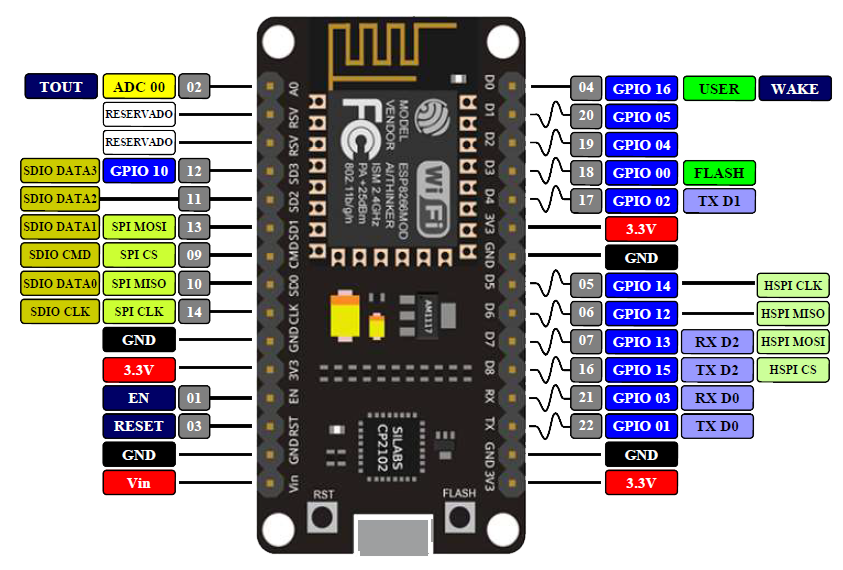
NodeMCU pin diagram:

    CH340 v3 NodeMCU pin diagram

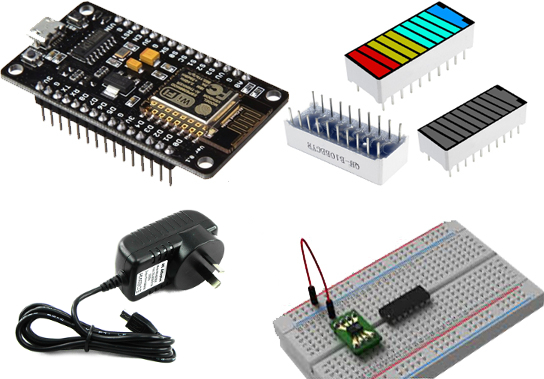
    What comes as part of the IoT starters kit:

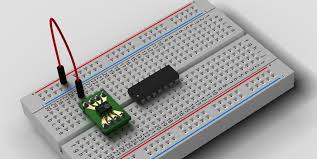
    1. Mini Breadboard

    Bread Board

    2. CH340 V3 NodeMCU Board

    CH340 v3 NodeMCU

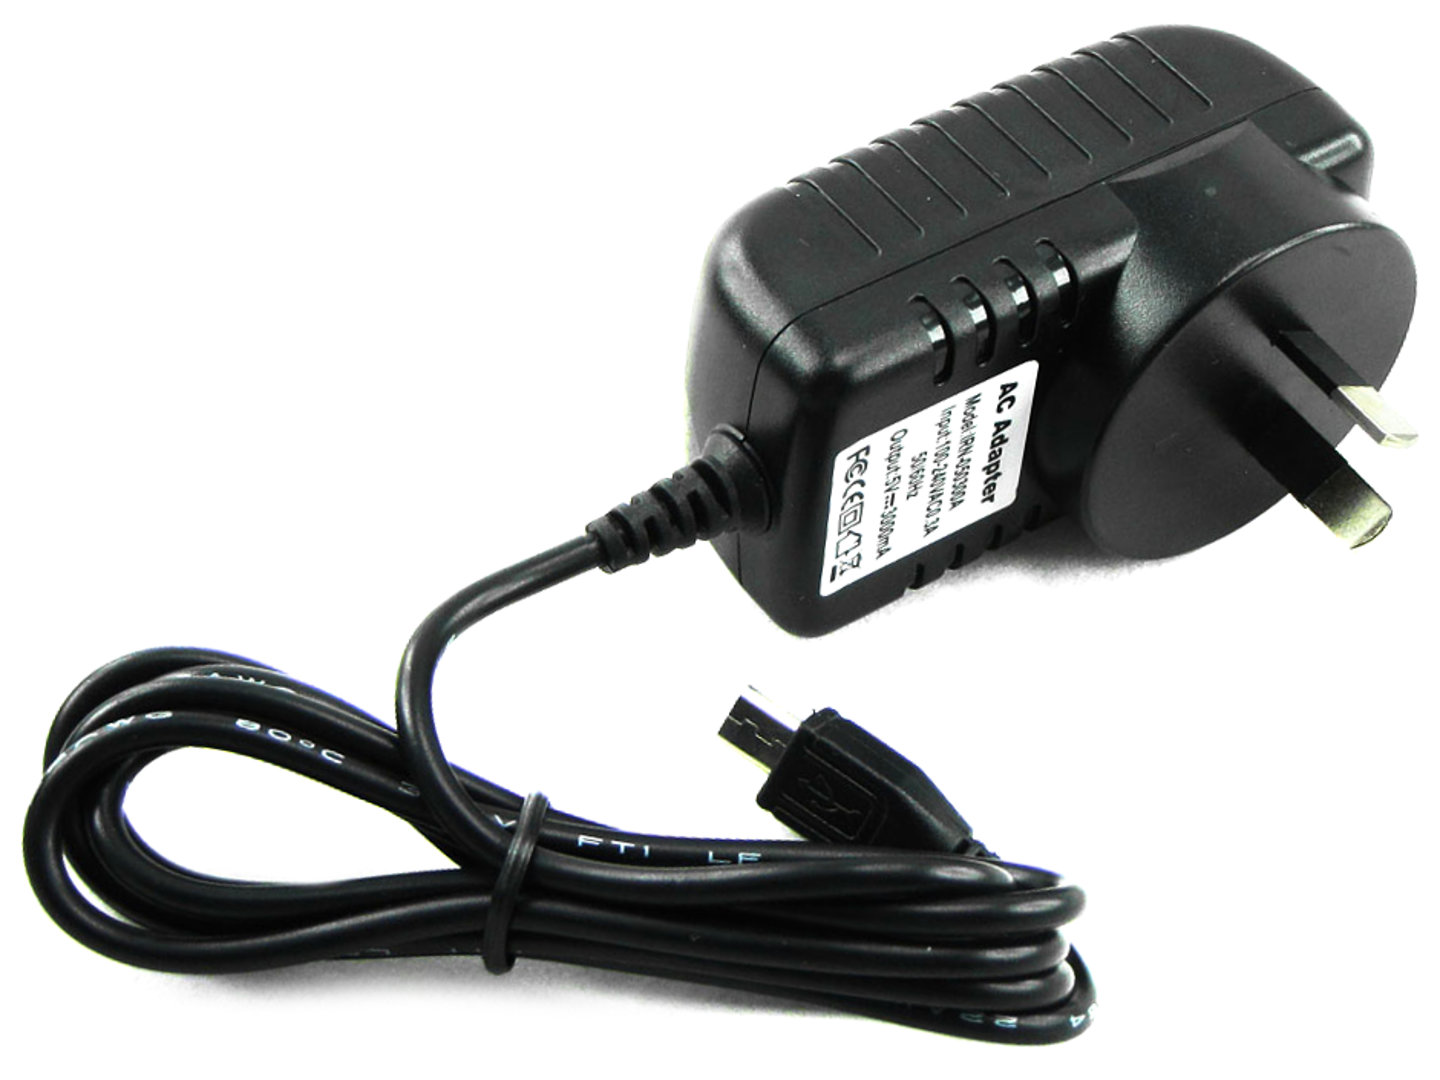
    3. 5V Power Adapter for power supply

    4. 10 Segment 4 Color LED Strip

    10 Segment 4 Color LEDs

    Complete kit:

    Complete kit


    Instructions on programming NodeMCU v3 using Arduino IDE

    https://maker.pro/arduino/projects/programming-espnodemcu-with-arduino-ide


    Home Automation with NodeMCU

    https://medium.com/@rxseger/esp8266-first-project-home-automation-with-relays-switches-pwm-and-an-adc-ad25f317c74f


    Weather forecast with NodeMCU

    https://randomnerdtutorials.com/esp8266-weather-forecaster/


    Motion detection with NodeMCU

    https://www.instructables.com/id/NodeMcu-Motion-Detection-Led/


    Publishing temperature reading to ThingSpeak

    https://randomnerdtutorials.com/esp8266-daily-task-publish-temperature-readings-to-thingspeak/

    Catalog: 

    Price: $45.00

    Fingerprint scanner : door security kit

    Description: 

    Having problems with memorising the password? Forgetting the combination code?
    With the Fingerprint Sensor Kit you can protect your treasures or secrets using your biometric ID.
    ie your fingerprint.

    Fingerprint is your unique signature which you carry with you everywhere you go, so unique that you
    can use it to open locks and use it as your password.

    It is complicated to build a complete system to do your own fingerprint sensing and integrate it with a lock,
    For this reason we bring a complete kitset with step by step instructions to get going a Biometric fingerprint kit
    which can open a door lock.

    Our Kit in action - Biometric Door Lock:

    Fingerprint scanner, biometric system, biometric devices, attendance system, fingerprint reader, fingerprint technology, biometric card, fingerprint attendance system, fingerprint login,

    Instructions:


    1. Adding fingerprints to the reader

    2. Assembling the fingerprint scanner kit parts and testing it works

    3. Building the complete biometric kit with scanner and a OLED display

    Catalog: 

    Price: $149.00

    Arduino Delux starter kit

    Description: 

    The Arduino as a computing module is a great start for someone who wants to learn programming, play with hardware and control things. Arduino as a platform makes it very easy to get started with loads of free example code bundled in its IDE.

    To build some serious projects and to master this little board, what a hobbyist needs is a lot of sensors. Without sensors the Arduino is a like a computer without any purpose.

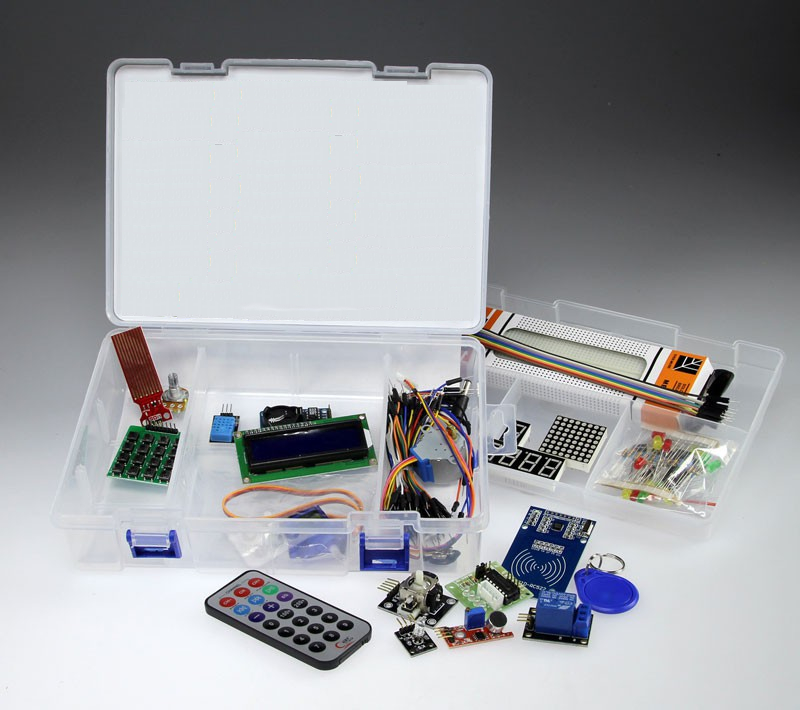
    This Arduino kit fills that vaccum by giving the user a complete array of sensors to build complete projects one can be proud of and gives you immense learning.

    The complete kit comes in a nice portable casing.

    Some of the things one can build with this kit set is :

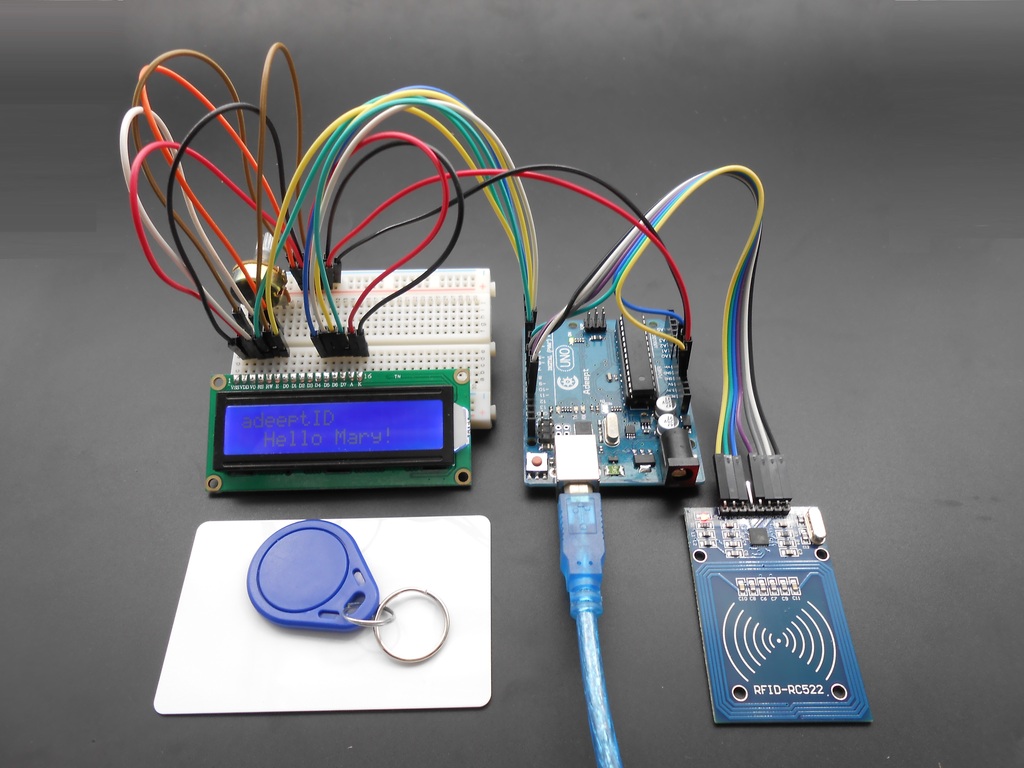
    •  Selectively give access to rooms or electronic gear using the RFID module
    •  Detect the weather using the Humidity and Temperature sensor
    •  Build a stepper motor driver and control its speed. 3D printer work using Stepper motors, controlling this is great fun and learning.
    •  Sense sound levels and build a clap sensitive switch
    •  Control Servo's, Most RC planes and robotics does heavy use of servos. Understanding the workins of Servo and control is great for automation
    •  Control of displays, be it LED's or 8 segment display or 16x2 LCD display
    •  Do actions at certain time of the day using the Real time clock module, this gives Arduino a sense of time

    Kit includes:

    Arduino, arduino starter kit, practical arduino, for arduino, how to arduino, arduino is, arduino and, with arduino,starter kit, projects for arduino, projects on arduino, arduino project, uno arduino, arduino uno

    Catalog: 

    Price: $119.00

    DIY Radio kit

    Description: 


    Product Overview

    The CF210SP is an AM/FM two band radio kit, perfect for electronics enthusiasts.

    With size just 65x100mm it’s a great pocket radio for hiking or fishing, providing good sound quality for such a small unit.

    Specification:

    The FM band receives frequency range of 76 – 108 MHz

    The AM band receives frequency range of 525 – 1605 KHz

    Kit requires 2x AA batteries

    NOTE: Recommended for a hobbyist with moderate soldering skills, and electronic components knowledge.

    On both sides (very descriptive) and solder mask on the rear side.


    Things You Need:

    About two hours of time to complete the kit.

    Soldering iron with a fine tip (SMD chip)

    Solder wire

    Side cutters to cut off component legs

    Hot melt glue, to stick the speaker, ferrite rod antennas into place.

    Small Philips head screwdriver

    Small flat-blade screwdriver to perform the variable-cap tuning

    Two AA batteries


    Video on Assembling the kit

    Tips and tricks:

    The old schools teach us to start with the passive components, smaller first, then bigger, and the IC’s on the end of any electronics assembly. In this case, start first with the SMD chip IC1 - it’s easier to have the PCB laying flat on the surface

    Take care with the orientation of the variable capacitor. The thin tab faces the edge of the PCB, and the “fat” tab sits inside the slot cut in the PCB

    Scrap enamel from the ends of the two coils (7T5 and 8T5). Will help when you start soldering them in place

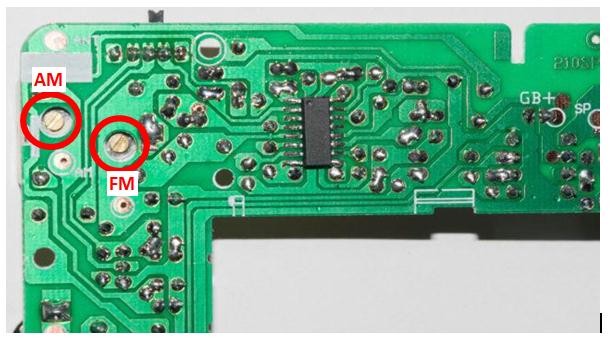
    Final Tuning: start alignment with the FM band, adjust L2 coil (8T5) according to known radio station, and debug. Stretch the coil for high frequency, shrink (squeeze) the coil for low frequency. Adjust several times to ensure you cover 76-108MHz, and in parallel use flat blade screwdriver and adjust right brass screw on the rear of the variable capacitor (the lower one)


    •  For AM band tuning: adjust the left brass screw (the higher one). If you don’t hear anything on the AM band, it’s a good indication the connections to the coil, or the IC may not be soldered correctly. Try re-soldering as the enamel on the wire can be tough to break through especially if you’ve cut (trimmed) the wire
    • You might find the case is hard to close and doesn’t make up at the seams, especially near the headphone jack. Reaming out the hole slightly using a large Philips head screwdriver seems to do the trick.

    Catalog: 

    Price: $39.00

    InfraEye: Thermal imaging kit

    Description: 

    The visible spectrum is that part of the electromagnetic spectrum which our eyes can see, It can see light of wavelengths 390 to 700nm.

    The long infrared window (wavelength 9 - 14 um) lies outside the range of human vision, There are fascinating applications when one can can see the infrared. This kit allows you to do just that.

    All objects emit infrared radiation according to the black body radiation law, using this thermal cameras can see without the need of visible illumination. The applications of thermal imaging span many areas from medical, night vision to checking home insulation and finding sources of heat leakage.


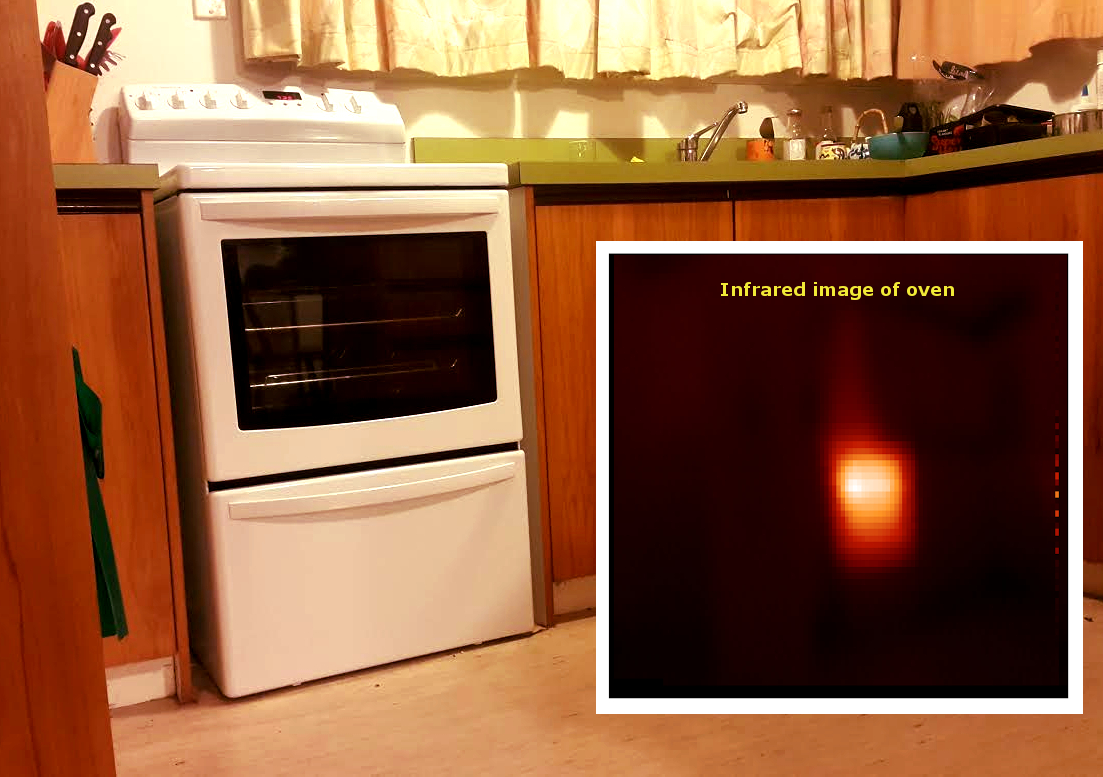
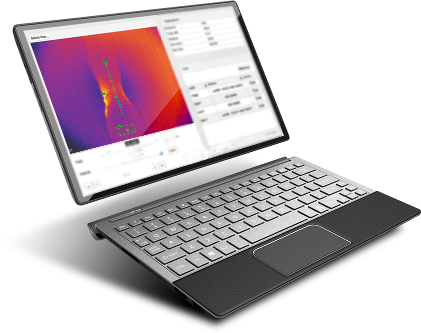
    Below is the sample image created using the kit of a heated oven. One can clearly see the hottest part of the oven as well as see the heat escaping from the oven to the surroundings.


    How the kit works:

    The kit uses a very sensitive contactless temperature sensor which measures temperature without contact. Unlike most temperature sensors, this sensor measures infrared light bouncing off of remote objects so it can sense temperature without having to touch them physically. Simply point the sensor towards what you want to measure and it will detect the temperature by absorbing IR waves emitted.

     This sensor can provide the temperature of one point, But to construct an thermal image we need many readings from different points. This is accomplished by having the sensor scan the area of interest and taking readings and using the data to construct the image.

    The scanning is done using 2 axis gimbal which is rotated using X and Y axis servos, the scanner with the thermal camera is as shown below:

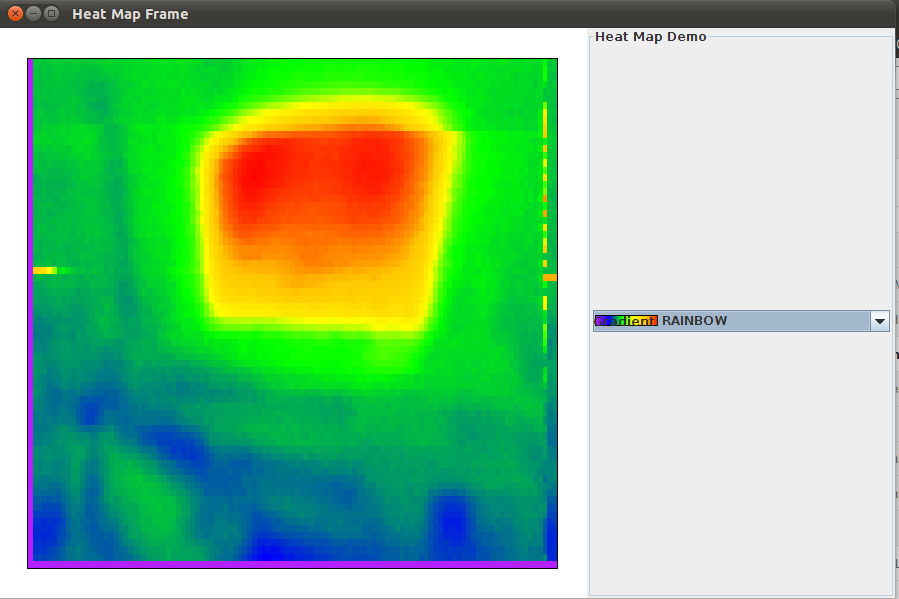
    est weather satellite,sattalite images,satellite weather real time,animated satellite weather,thermal imaging techniques,active weather satellites,infrared trees,infrared imaging news,satellite radar images,colour infrared film,infrared photograph,what does infrared look like,infra red images,us satellite map,recent satelite images,satellite infrared weather,satellite image usa,britain satellite image,infra red pictures,thermal imaging wiki,weather satelites,east pacific weather satellite images,america satellite view,stallite map,sattilite image,satilight image,satelite weather image,how to make an infrared filter,weather satallite,satellite image of north america,infrared colour film,satillite weather,weather satelit,satelite image weather,infrared pics,north america satellite image,satellite images north america,satallite weather,images of the weather,weather channel satellite map,weather satillite,usa satellite weather,us weather satellite image,satellite image of,satilite imagery,infrared photography how to,infared photo,infared photos,infrared photography techniques,satellite photography,satelite immage,satallite imagery,american ir,usa satellite map,image of a satellite,irpdf,usa weather satellite,infared pictures,infrared film photography,satallite image,satellite imaginary,thermal imaging business,ir usa,satellite weather usa,radar satellite map,thermal imaging camers,thermal imaging service,thermal imaging electrical,sattelite weather,infrared clouds,infrared thermal imaging camera cheap,live satellite cloud cover,infrared camera ipad,24 hour satellite,infared filter,infrared thermography inspection,satilite photos,digital thermal imaging,infrared thermal imaging camera prices,weather satellite usa,thermal imaging applications,satellite map of america,satelight image,weather real time satellite,images of weather satellite,satellite and radar weather,ir loop,us satellite image,infrared satellite weather,map of ir,termal imaging,infared imaging,thermal imageing,satilite image,international weather satellite imagery,world weather live satellite view,weather satelite image,sattelite piWe provide a Java application which is the Thermal Image viewer which runs on PC/Laptop. This application is responsible for collecting the data sent from the temperature sensor via the Arduino and creates a visual Thermal image.


    Below is the image created by the InfraEye therma viewer when it scanned the heat dissipated by a LCD tv.


    The kit set comes with all the bits you need to construct the InfraEye Thermal viewer and accompaniying Java application and Arduino source code.

    This kit is a great learning experience and a source of endless fun. 

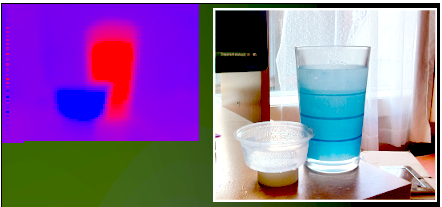
    Fig: Thermal imaging done with a glass of hot water and tub with iced water


    NOTE: There is a lead time of 10 working days for this kit


    Kit setup Instructions:

    1. Assembling the kitset

    2. Setting up the software

    3. Seeing some Thermal images and troubleshooting

    t

    Catalog: 

    Price: $149.00

    Arduino Experimenters Kit : Sense and control just about anything

    Description: 

    Arduino is a versatile platform which is easy to program and do simple to complex tasks with the help of open source libraries.

    Arduino board does not come with any sensors, this kitset bridges the gap and allows the keen Arduino experimenter to have access to an 
    array of sensors and controls to build many great projects.

    One common problem faced with interfacing hardware to arduino is lack of readily available examples to get it going, We provide a complete library (on purchase) for 
    all the sensors to make it easy for the user to get them going and move on to building interesting projects, Instead of having to struggle to find the right library for each sensor.

    This would be an ideal gift for any tinkerer who like to play with electronics and programming. This kit would offer hours of excitement, experimentation and
    learning and be a stepping stone to move on to build bigger things and solve problems.

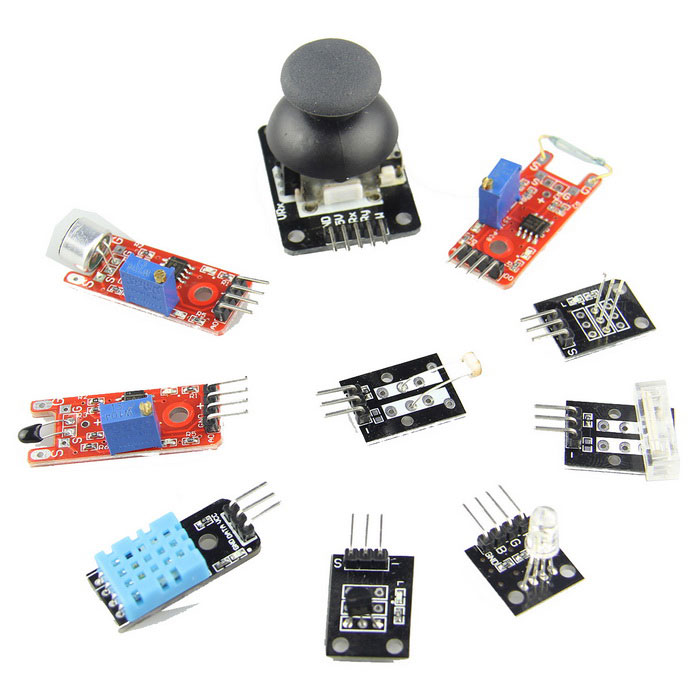
    This versatile kit for the Arduino comes with 30+ sensors which can be used for carrying out a variety of experiments. They have easy to use connectors which makes interfacing to the Arduino straight forward.

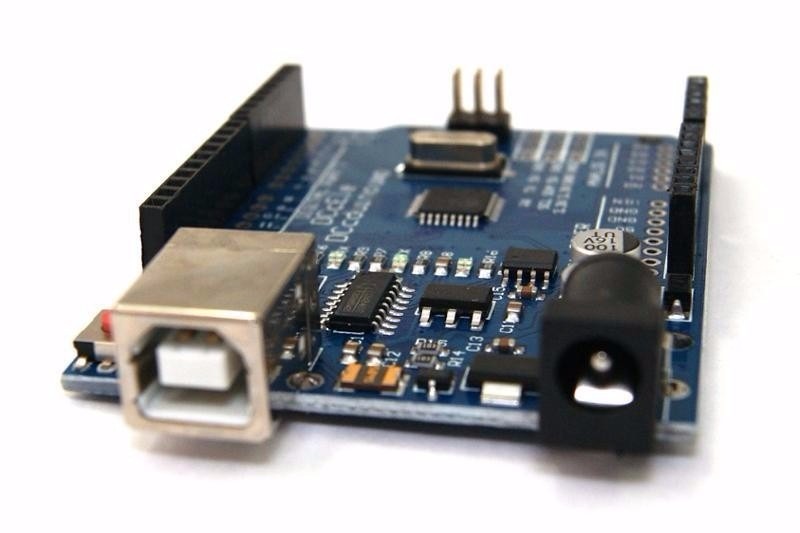
    This kit comes with an Arduino Uno compatible board along with all the below listed sensors:

    Joystick

    The analogue joystick has two axis and 2 x 10k potentiometers with a push button action. Connector pins are described on the PCB. Included with the module is a push-on operating knob.


    Relay

    This single relay module can be connected directly to an Arduino and requires a 5VDC supply for operation. The input is identified with an 'S'. The relay has one change over contact and can switch resistive loads up to 10A at 250VAC, and up to 10A at 30VDC maximum. Interference suppression will need to be provided.


    Sensitive Microphone

    This features a high-sensitivity large format electret capsule and a potentiometer which allows adjustment of the sound level. The output D0 (active high) is switched when the sound level exceeds a preset level. The analogue output is available at pin A0.


    Small Microphone

    Except for the smaller size of the capsule and lower sensitivity, this module is identical to the Sensitive Microphone above.


    IR Light Reflection Switch

    This switch is useful for avoiding obstacles or getting a model to move around the floor following a line. An obstacle in front of the sender/receive diodes will cause the output pin to be pulled low (active low). The detection range is approximately up to 1cm and a potentiometer allows the sensivity to be adjusted.


    IR Reflection Sensor

    Also useful for applications where obstacles need to be avoided. When an obstacle is detected by this unit the output pin becomes low (active low). This has improved distance sensitivity as it can detect objects up to around 7cm, with the sensivity adjustable through a potentiometer. An enable (EN) jumper can be installed to allow continuous operation. With the jumper absent it allows an external logic signal to be applied at the jumper to switch the detector on and off. This is active low.


    Flame Sensor

    With a typical spectral sensitivity range of 720-1100nm at an angle of 60 degrees, this module allows flames to be detected and is optimised to detect emissions from naked flames. When a flame is detected, D0 goes high (active high). The detection threshold can be adjusted with the potentiometer. The analogue output signal is accessible via pin A0.


    Linear Hall Sensor

    This detects the presence of a magnetic field. When such a field is present, D0 will go high (active high). The point at which this happens depends on factors such as field strength, polarity, and the position of the magnet relative to the sensor, and the sensivity adjustment of the potentiometer. The analogue output signal is available at pin A0.


    Touch Sensitive Switch

    Touching the sensor pin produces an output at D0 and is active high. The output includes 50Hz mains induced signals so it's not clean. The sensitivity can be adjusted with a potentiometer and the analog output signal is available at pin A0.


    Digital Temperature Sensor

    This temperature sensor uses a NTC style thermistor. A potentiometer allows a temperature threshold to be preset that causes D0 to switch high when that temperature is reached. The analog output from the sensor is accessible at pin A0.


    Buzzer

    It's all in the name really, this module is an electronic buzzer. Take care when hooking this up as 5VDC needs to be supplied on the '-' pin while ground is on the pin marked 'S'. It typically operates at a frequency of 4kHz at a minimum of 80dB and typically draws 5mA at 5VDC.

    This buzzer looks very similar to the passive buzzer below but can be identified as the buzzer itself is a little taller than the passive version.


    Passive Buzzer

    This buzzer, or mini loudspeaker, is slightly shorter than the buzzer above. It has 16 ohm impedence and maximum continuous current through the speaker coil is about 25mA. The outer two pins '-' and 'S' connect to the speaker and is not polarity sensitive.


    RGB LED

    This clear lense colour LED uses a 150ohm series resistor and can be used on 5VDC. The '-' is the common cathode but we aware that the labelling on the PCB is incorrect. Red and Blue are actually the other way around.


    SMD LED

    There's no series resistor supplied with this RGB LED, so you'll need to provide your own. A 220ohm resistor would be suitable. The '-' pin indicates a common cathode, but as before the PCB labelling is incorrect. This time however the Green and Red connections are switched.


    Bi-colour 5mm LED

    With this two colour LED, '-' represents the common cathode on the PCB. The pin marked 'R' is for the Red anode and the 'S' pin is for the Green anode. As there's no series resistor provided you'll need to provide one, around 220ohms.


    Bi-colour 3mm LED

    Like the 5mm LED above, the '-' on the PCB indicates the common cathode. The middle pin is the anode for the Red LED and the 'S' pin for the Green LED. As there's no series resistor provided you'll need to provide one, around 220ohms.


    Reed Switch

    In addition to a digital output on D0, this reed switch also offers an analogue output on A0. Ground can be found at the 'G' pin while '+' requires 5VDC. The potentiometer supplied is used as a pull up resistor.


    Mini Reed Switch

    The outer two pins on the three pin male connector join up to the reed switch. It is normally open and requires a magnetic field to close the contacts. A 10k ohm resistor is onboard and is connected between the centre pin and the 'S' pin. This can be used as a pull up or pull down resistor.


    Heartbeat Sensor

    This neat device can be used to read a person's pulse when a fingertip is placed between the Infrared LED and the photo transistor. External circuitry is needed. 5VDC needs to be supplied to the centre pin, ground connected to the pin marked '-' and the photo transistor signal is available at the 'S' pin (this has its own pull up resistor). A 300ohm resistor for the Infrared LED is included.


    7 Colour Flashing LED

    This clear lense LED runs directly from 5VDC and cycles automatically through a seven colour sequence. 5VDC needs to be connected to the 'S' pin and ground on the centre pin.


    Laser Emitter

    The laser module has a wavelength of 650nm in the red colour spectrum. 5VDC can be connected directly to the 'S' pin and ground to the '-' pin.


    Push Button Switch

    A 10k ohm resistor links the centre pin and the pin marked 'S' and this can be used as a pull down or pull up resistor. The two outer pins connect to the push button. There are various button libraries available for the Arduino that can be used with this module.


    Shock, Rolling Ball Type Tilt Switch

    The switch contacts are available on the two outer pins, 'S' and '-'. A 10k ohm resistor links the centre and 'S' pins and can be used as a pull down or pull up resistor.


    Rotary Encoder

    This encoder is useful for making an electronic potentiometer. Pin indentification markings are on the PCB.


    Light Cups
    Supplied as a pair, these modules feature a mercury tilt switch and transparent red LEDs. The LED cathode and one terminal of the switch is available at the 'G' pin. The other side of the switch is available at the 'S' pin, and 'L' connects to the LED anode (a series resistor is not provided so a 220 ohm resistor will need to be connected up). The '+' pin connects to a 10k ohm pull up resisitor connected to the 'S' pin of the switch.


    Tilt Switch

    Depending on the altitude this sensor is positioned at, the mercury tilt switch will make or break a connection.


    Rolling Ball Tilt Switch

    Depending on your application, the built-in 10k ohm resistor connected between the middle and 'S' pins can be used for pull down or pull up use. The outer two pins are for the switch contacts which have a maximum switching load of 50mA at 12VDC.


    Photoresistor

    The photoresistor, also known as a Light Dependent Resistor (LDR), determines darkness when the resistance is over 20M ohm, and light at less than 80 ohms. The two outside pins are to be used. There is a 10k ohm resistor on the module between the middle and 'S' pins which simplifies the construction of a measurement bridge circuit.


    Temperature and Humidity

    The popular DHT11 sensor allows reading of temperature and humidity. It can sense temperature in the 0-50 degrees celcius range (+/- 2%) and relative humidity in the 20-95% (+/- 5%). It operates on a supply voltage of 3VDC to 5.5VDC and features a built-in 10k ohm pull up resistor. For use with the Arduino DHT.h library.


    Analogue Hall Sensor Switch

    This module features either a 44E311, 3144EUA-S, 3144LUA-S or 49E504BG sensor and has an LED and resistor. When a magnetic field is detected the LED switches on. Ground is indicated by a '-' on the PCB, signal on the 'S' pin and 5VDC on the centre pin.


    Hall Magnetic Module

    A hall effect sensor module featuring an analogue output signal. The output is available on the pin indicated by 'S', ground on the pin indicated by '-' and 5VDC supply on the middle pin.


    Temperature Sensor

    The DS18B20 is a one wire digital temperature sensor with a range of -55 to +125 degrees celcius. Depending on the program, it has a resolution of 9-12 bits with an accuracy of 0.5 degrees celcius. A 4.7k ohm pull up resistor is included on the bus line. Extra sensors can be added to the bus and individually addressed. Only one pull up resistor should be connected to the bus, no matter how many sensors of this kind are used together.


    Analogue Temperature Sensor

    An NTC temperature sensor. The sensor resistance is approximately 10k ohm when at room temperature and the output can be accessed via the two outer pins. A fixed 10k ohm resistor connected between the middle and 'S' pins is included which simplifies the construction of a measurement bridge circuit. Like the DS18B20 digital sensor above, it shares the same temperature range and accuracy.


    IR Emitter

    If you want to create your own IR remote control then you will find this emitter useful. Ground is available at the '-' pin, 'S' is the data in while the middle pin is 5VDC supply.


    IR Receiver

    This sensor is the 1838 type and is for use with 38kHz IR signals. It works on a supply voltage of 2.7V to 5.5V, 37.9kHz frequency, with a typical range of 18m and a receiving angle of 90 degrees. A useful library for this is available at https://github.com/shirriff/Arduino-IRremote.


    Tap Module

    This module senses vibrations. The momentary switch contacts are available at the outer two pins.


    Light Blocking Sensor

    A slotted light barrier. The middle pin requires +5VDC supply and ground is available at '-'  with the output signal available on the remaining pin and has a 10k ohm pull up resistor connected to +5VDC.
    Catalog: 

    Price: $79.00

    Sand Beast: Wind powered mechanical walking robot

    Description: 

    For the past 20 years, Dutch artist Theo Jansen has been perfecting a new form of life—the “Strandbeest.”

    Like a modern-day Leonardo da Vinci, Jansen has applied both artistic and engineering skills to create the giant mechanical creatures that can walk on their own, powered only by the wind.

    “Strandbeests”—or “beach animals”—consist of skeletons fashioned from lightweight PVC tubes. Wind propels their wing-like sails, which then drives their feet to walk sideways. Created on the Dutch seaside, the strandbeests know to avoid water, walking in the opposite direction as soon as it comes in contact with their feelers.

    We bring to you a kit which encompasses the creativity and the engineering involved in the StrandBeest into a tabletop kit.

    These mini versions of his giant contraptions come with detailed instructions. The Strandbeest (strand as in beach because it was made to walk on sand), an 8" x 6-5/8" x 4-1/4", 117-part wind-powered automaton.


    Video: The kit explained 


    Features:

    It walks using wind power, you can get it walking even by blowing against the propeller

    No batteries needed

    Great gift for the inquisitive mind

    Material: Plastic

    Age: 7-18 age

    Height (back of the beast): 11cm (4.3")

    Height (top of propeller): 17cm (6.7")

    Width: 13cm (5.1")

    Length: 20cm (7.9")


    Catalog: 

    Price: $49.00

    Add Raspberry Pi camera as your friend in Instant Messenger

    Description: 

    These days almost everybody is connected to the internet on their phones, The thing people like doing most is staying in touch with friends on Instant Messengers like Whatsapp, Facebook, Hangouts, Telegram.

    Whats missing here ? All the cool devices in your home needs to be on your friends list too!!!!

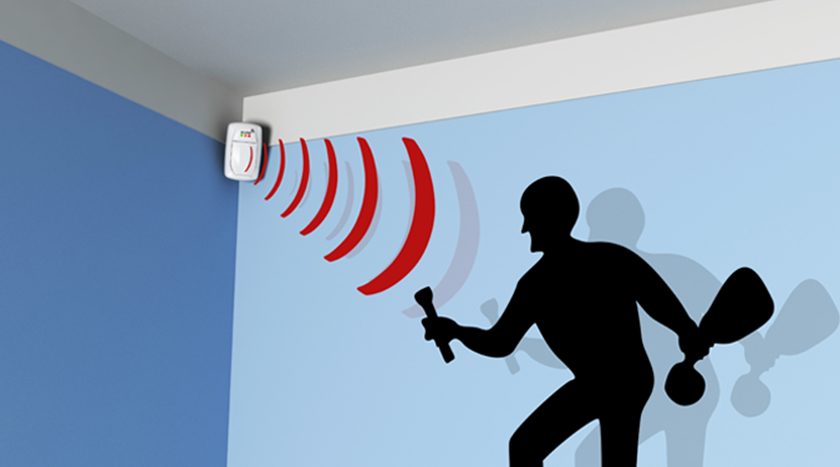
    How about having your Home Alarm system on your friends list, It sends you a message and photo when the alarm gets tripped, How cool would that be?

    More ideas:

    •  Your heat pump as a friend: Send it a message before you get home and it warms up your house

    •  Ask your garage door to open from a messenger

    •  Watch your pets with pictures from messenger when you go on vacation

    •  Water your plants with 'water' command....

    These ideas are endless...

    For this reason we bring to you a kit which connects a Raspberry Pi to Telegram Instant Messenger.

    What does the kit do:

    • Its PIR sensor senses motion and sends out a message to you every time its trigerred

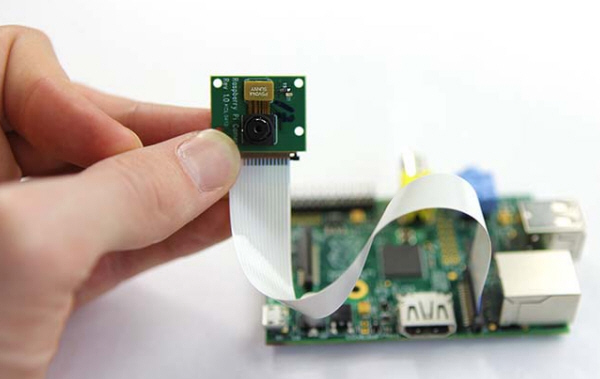
    • The Raspberry Pi has a camera, the moment the motion sensor is triggered the Pi takes a picture and sends it on Instant messenger

    • It has got a neat interface where you can change settings right in the Messenger

    • Its a matter of adding more sensors and expanding the kit to do whatever more you want it to....

    What the Kit comes with:

    •  PIR sensor

    •  Raspberry Pi Camera

    •  Wifi Dongle

    •  8GB SD card with all the needed software pre installed

    •  Breadboard and detailed instructions to get it going

    Whats not included

    • Raspberry Pi

    • Patience

    Detailed step by step tutorial making it a breeze to set it up:

    1. Getting the Raspbery pi on the Wifi and Messenger

    2. Wiring the Motion Sensor and Camera

    3. Getting Raspberry pi to start messaging  you

    Raspberry pi projects, Raspberry pi camera, Raspberry pi b+, Telegram app, Raspberry pi 2,

    Raspberry pi wifi, raspberry pi 2, raspberry, raspberry pi case, pi camera, telegram messenger, security lights, motion sensor camera, pi sensor, solar security light,

    Catalog: 

    Price: $199.00

    Pages

    Zircon - This is a contributing Drupal Theme
    WeebPal